
Start your VPS now with FREE $100 credit.
Apache is a most-popular and widely-used web server around the world beside Nginx web server. It’s almost compatible with all of the rewrite rule used by content management system (CMS) like WordPress, Drupal, Joomla or custom web apps. Well, today we will teach you on how to set up and configure Apache VirtualHost (Vhost) on Rocky Linux 8.5 (Green Obsidian). Without that you cannot run a website or blog under Apache web server.
Make sure to meet the following requirenment in order to setting up virtualhost on your Apache web server. And you should have active and running Apache web server inside your virtual machine. Hoever, if you don’t have Apache web server installed on your Linux machine, you can read our previous articles on How To Install Apache, MariaDB 10.6 and PHP 8.1 on Rocky Linux 8.5.
PRE-REQUISITES:
* VPS, Cloud, or Bare-Metal Server
* Running on Rocky Linux OS 8.5
* Server IPv4 Address
* Superuser Privileges (Sudo Access)
* Gnome Terminal for Linux Desktop
* PuTTy SSH Client for Windows or Mac
* Powershell for Windows 10/11
1.) Creating Documents Root or Public_Html Directory
We will use our subdomain to create simple web application with WordPress. Make sure to replace with our own domain name. From this step we need to create docs root or public_html directories along with its logs directory.
$ mkdir -p /var/www/dev.fcgid.com/public
$ mkdir -p /var/www/dev.fcgid.com/logs
2.) Let’s Create Main Directory to Store VirtualHost Files
Next, you can create a main directory to store your virtualhost files, including sites-available and sites-enabled directories. It’s almost similar to Nginx web server with have the same serverblock scenario. Please note that all of your website virtualhost is saved at /etc/httpd/sites-available but it’s not enabled by default if you don’t enabled it from your side.
There also sites-enabled which is actually symbolic link a.k.a symlink of the sites-available directory. Your website can running properly after creating symlink from sites-available directory.
$ mkdir -p /etc/httpd/sites-enabled /etc/httpd/sites-available
3.) Edit Apache Configuration
After that you must edit Apache configuration file to include your sites-enabled.conf into httpd.conf. Simply put the following command “IncludeOptional sites-enabled/*.conf” at the bottom line of the httpd.conf file.
$ nano /etc/httpd/conf/httpd.conf
---------------------------------------------------------------

# Load config files in the "/etc/httpd/conf.d" directory, if any.
IncludeOptional conf.d/*.conf

IncludeOptional sites-enabled/*.conf
---------------------------------------------------------------
Test if your Apache config have no issues with the following command.
$ httpd -t
Syntax OK
OR
$ apachectl configtest
Syntax OK
Then restart your Apache HTTP Web Server using below command.
$ service httpd restart
Redirecting to /bin/systemctl restart httpd.service
4.) Create Simple VirtualHost File
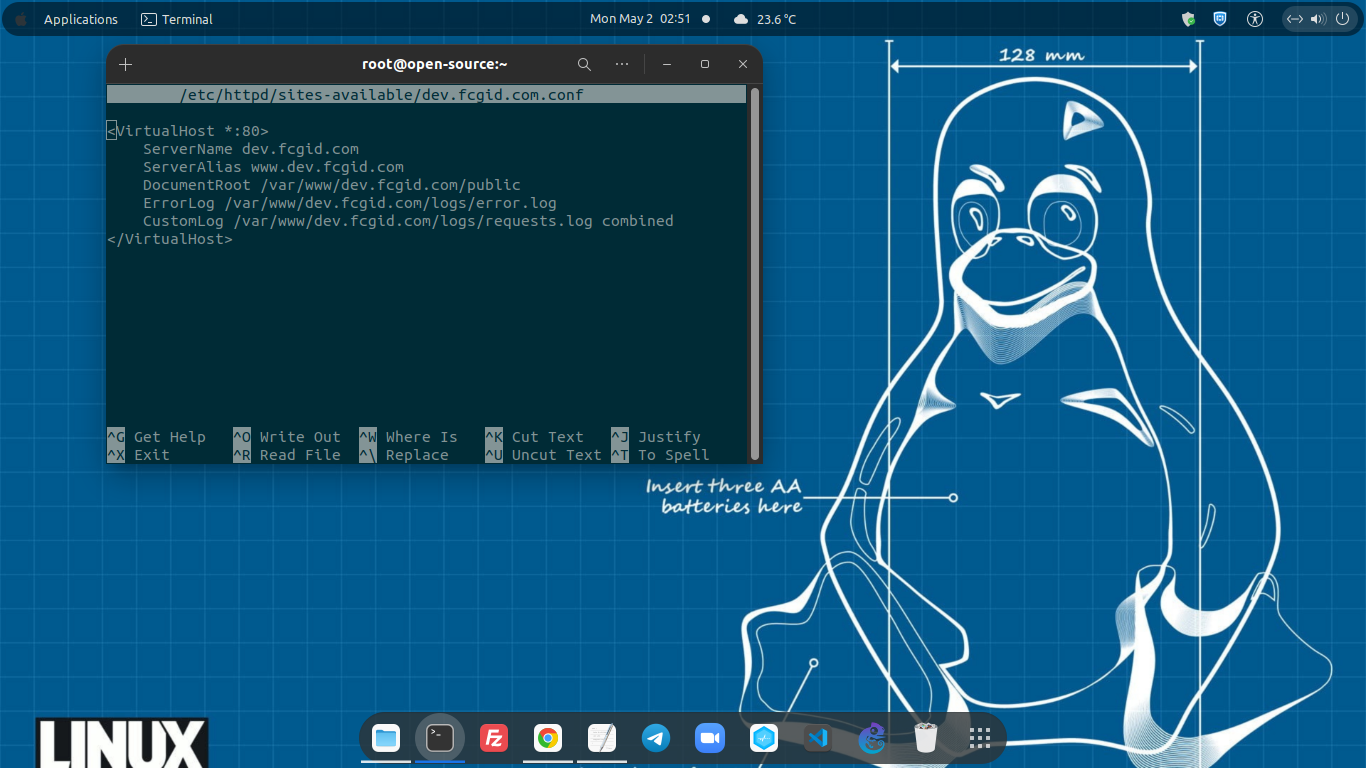
After that you can create a simple virtualhost on your HTTPD Config. Make sure to replace with your own domain names. We will use our subdomain dev.fcgid.com, then put the following code into this virtualhost.conf file.
$ nano /etc/httpd/sites-available/dev.fcgid.com.conf
Then paste the following configuration in your vhost file.
<VirtualHost *:80>
      ServerName dev.fcgid.com
      ServerAlias www.dev.fcgid.com
      DocumentRoot /var/www/dev.fcgid.com/public
      ErrorLog /var/www/dev.fcgid.com/log/error.log
      CustomLog /var/www/dev.fcgid.com/log/requests.log combined
</VirtualHost>
It will listen on plain port 80 (HTTP) to serve HTTP website. Then save the virtualhost config file and and make sure the configuration is correct by running the following command.
$ apachectl configtest
Syntax OK
5.) Create a Symbolic Link or Symlink
After that don’t forget to create a symbolic link or symlink to make your website or blog can be accessed over public internet. Simply run the following command.
$ ln -s /etc/httpd/sites-available/dev.fcgid.com.conf /etc/httpd/sites-enabled/dev.fcgid.com.conf
6.) Update SELinux Config
You need to update SELinux config in order enable Apache running with custom directories. SELinux is work by default only with default Apache directories. So, we must modify Apache rule to work with custom log directories. Simply run the following command.
$ setsebool -P httpd_unified 1

7.) Install WordPress
Then we can install CMS like WordPress, Drupal, and Joomla. Simply use the following commands.
Move into the document root directory.
$ cd /var/www/dev.fcgid.com/public
Download the latest stable release of WordPress version using WGET command. You can install wget first if you don’t have wget packages installed on your system previously.
$ dnf install wget -y
DigitalOcean Agent 65 kB/s | 3.3 kB 00:00
DigitalOcean Droplet Agent 65 kB/s | 3.3 kB 00:00
Dependencies resolved.
=====================================================================================================================================================
Package Architecture Version Repository Size
=====================================================================================================================================================
Installing:
wget x86_64 1.19.5-10.el8 appstream 733 k
Installing dependencies:
libmetalink x86_64 0.1.3-7.el8 baseos 31 k

Transaction Summary
=====================================================================================================================================================
Install 2 Packages

Total download size: 763 k
Installed size: 2.8 M
Downloading Packages:
(1/2): libmetalink-0.1.3-7.el8.x86_64.rpm 135 kB/s | 31 kB 00:00
(2/2): wget-1.19.5-10.el8.x86_64.rpm 2.3 MB/s | 733 kB 00:00
-----------------------------------------------------------------------------------------------------------------------------------------------------
Total 1.7 MB/s | 763 kB 00:00
Running transaction check
Transaction check succeeded.
Running transaction test
Transaction test succeeded.
Running transaction
Preparing : 1/1
Installing : libmetalink-0.1.3-7.el8.x86_64 1/2
Installing : wget-1.19.5-10.el8.x86_64 2/2
Running scriptlet: wget-1.19.5-10.el8.x86_64 2/2
Verifying : wget-1.19.5-10.el8.x86_64 1/2
Verifying : libmetalink-0.1.3-7.el8.x86_64 2/2

Installed:
libmetalink-0.1.3-7.el8.x86_64 wget-1.19.5-10.el8.x86_64

Complete!
$ wget https://wordpress.org/latest.zip
Let’s extract it using unzip command.
$ unzip latest.zip
Then move all WordPress files into the document roots or public directory.
$ mv /var/www/dev.fcgid.com/public/wordpress/* /var/www/dev.fcgid.com/public
Set Correct Ownership for Files and Folders.
$ chown -R apache:apache /var/www/dev.fcgid.com/public/
7.) Set The Right User Ownership
Make sure to use the right user ownership for the website document root directory. The default user ownership is user apache and group apache. After that let’s restart Apache web server using the following command.
$ systemctl restart httpd
8.) Create MySQL Database and its User
Then let’s create database, user along with its password on your database server, either it running under MySQL or MariaDB. Simply run the following commands.
$ mysql -u root -p
---------------------------------------------------------------------------------------------

$ CREATE DATABASE database_name;

$ CREATE USER database_user_user@localhost;

$ SET PASSWORD FOR database_user@localhost= PASSWORD("YourPassword");

$ GRANT ALL PRIVILEGES ON dev_web.* TO dev_user@localhost IDENTIFIED BY 'YourPassword';

$ FLUSH PRIVILEGES;

$ exit
---------------------------------------------------------------------------------------------
9.) Let’s Install WordPress
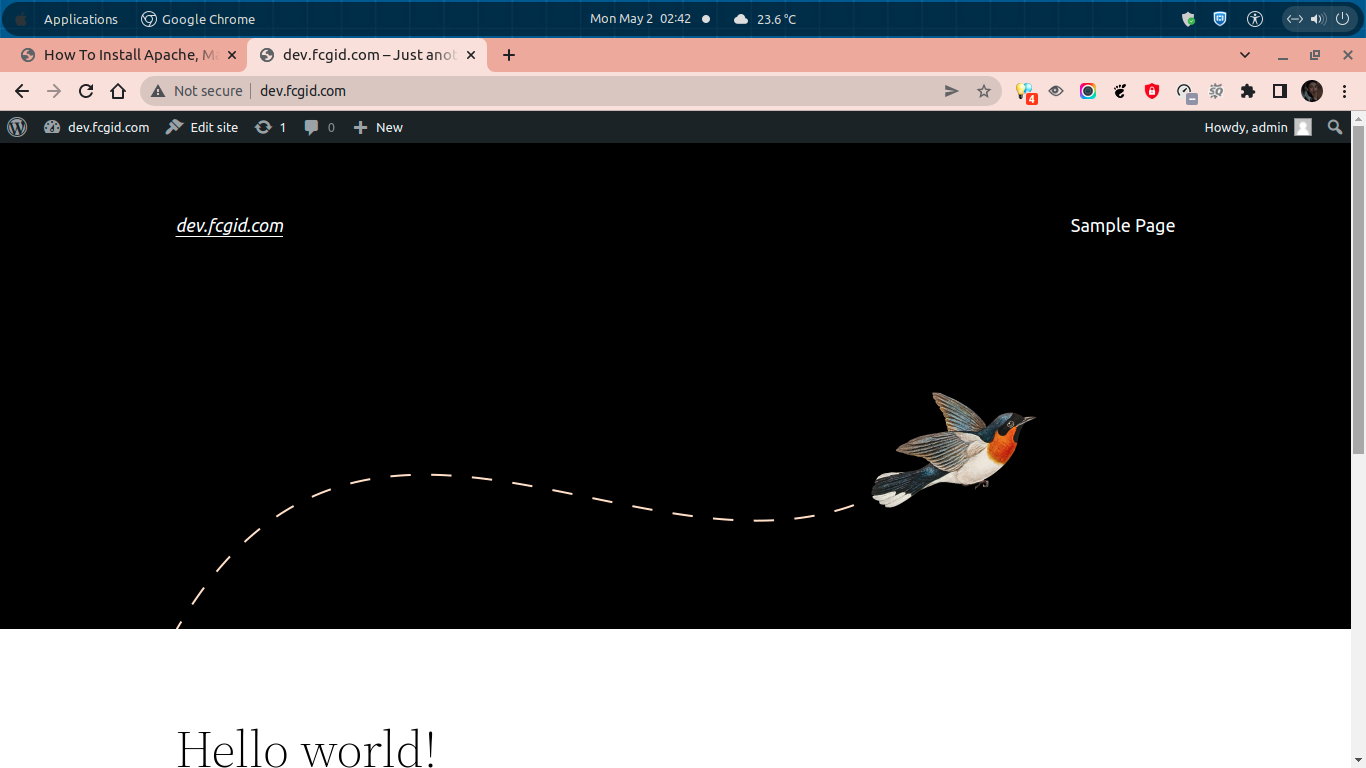
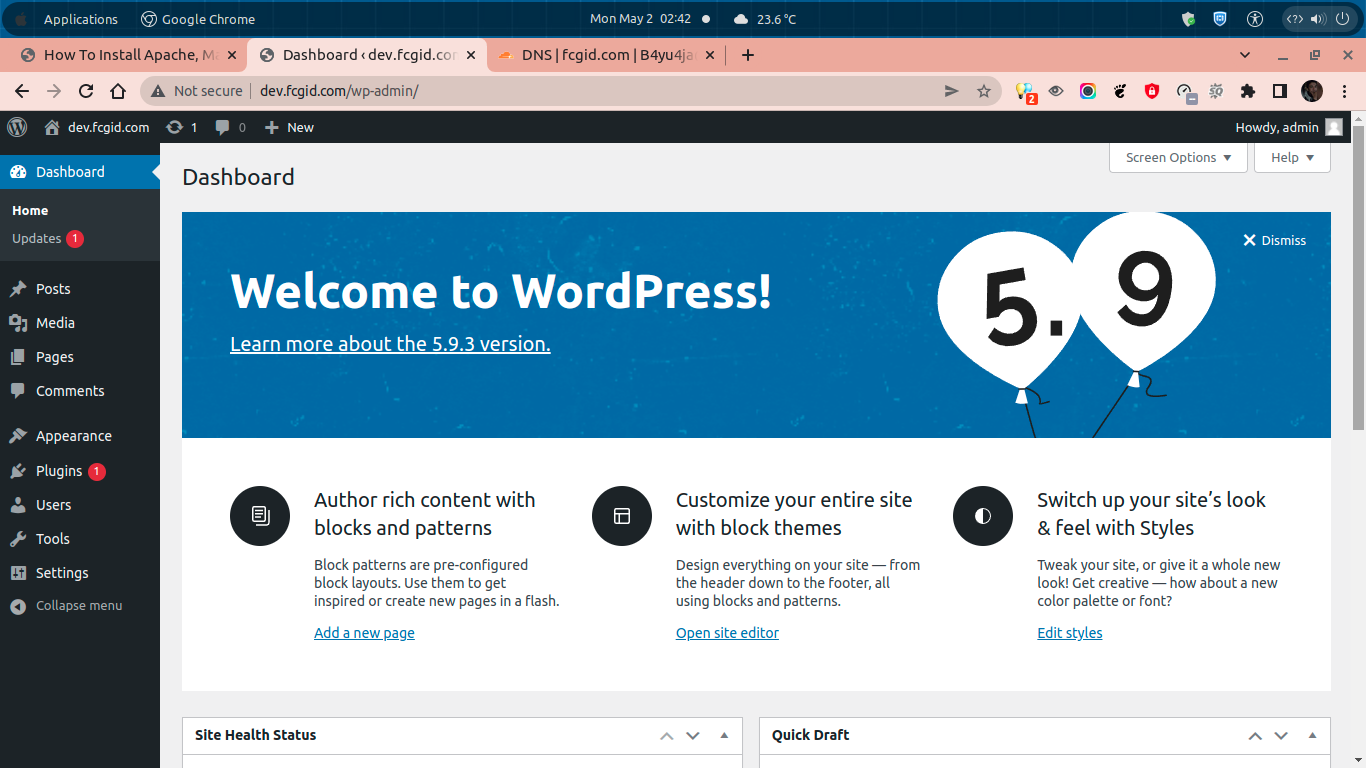
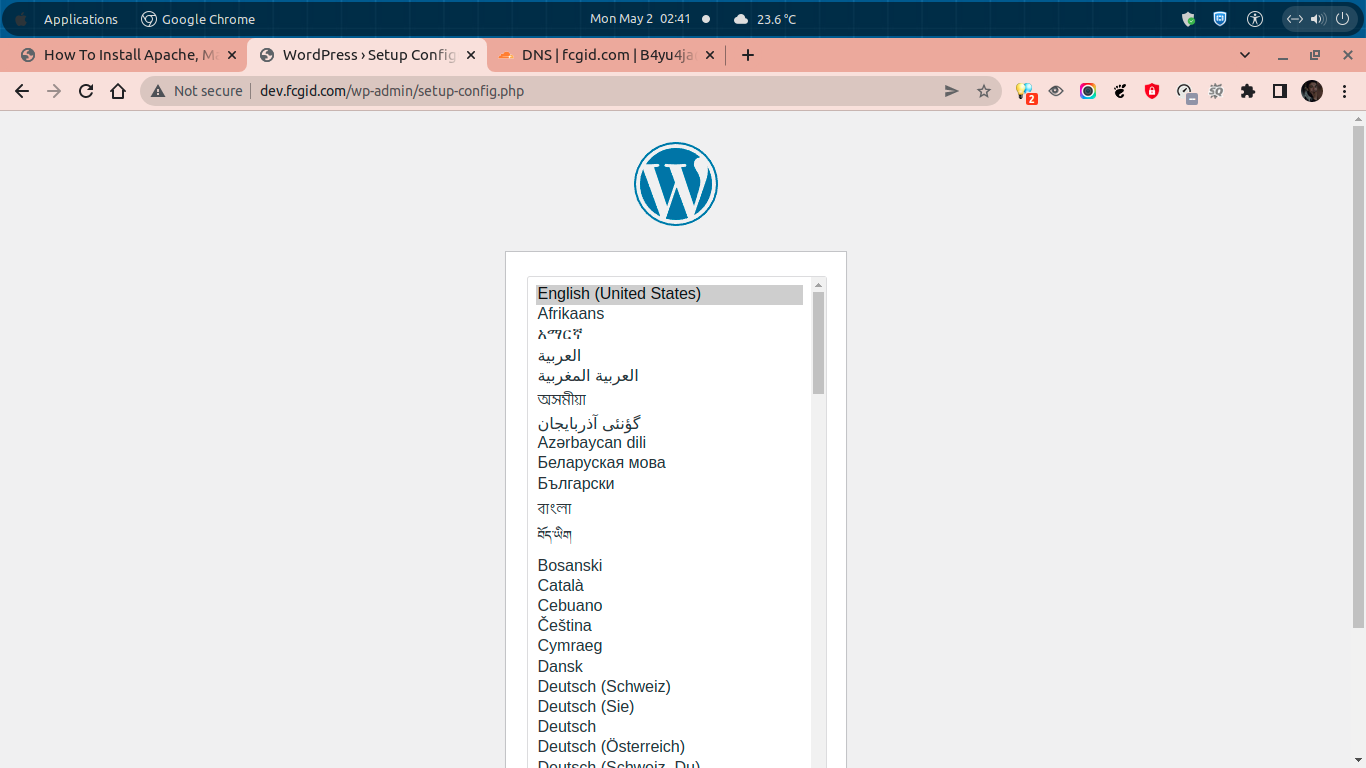
Kindly open your web browser, eg Chrome or Firefox to install WordPress on your domain names.

CONCLUSION:
We’ve successfully in setting up virtual host to install and run simple websites or blogs with WordPress CMS on the Apache HTTP Web Server.
