

Start your VPS now with FREE $100 credit.
This tutorial will guide you on how to install and setup the Nginx web server with FastCGI-Cache, MariaDB 10.4, and PHP-FPM on Ubuntu 19.04 LTS (Disco Dingo).
If you followed our previous tutorial, you should have read how to configure the LEMP stack on Ubuntu 18.04 LTS.
As you know Nginx is a high-performance HTTP server, more powerful than the Apache web server and it’s completely free.
We love Nginx because Nginx is very efficient in terms of server resource consumption, including CPU and Memory (RAM), and has more reliable performance than other web servers.
Well, in this guide we will setup the Nginx web server with FastCGI-Cache on our cloud server. And then we will run a WordPress-based site to test Nginx with the FastCGI caching module.
FastCGI-Cache is an extra module from Nginx that has directives for caching dynamic content and it’s served directly from the PHP backend.
It also includes a cache purge module, which allows us to clear the cache in one click. So we don’t need to use additional page cache plugin on our WordPress site.
Since with FastCGI-Cache we have a more powerful and reliable cache module for a WordPress site.
On the other hand, we can actually combine FastCGI-Cache with Memcached or Redis for database caching in order to get better performance improvements on the WordPress site.
Well, in the next tutorial we will guide you on how to setup Memcached/Redis as a database cache for your WordPress site. Ok… let’s setup Nginx + FastCGI-Cache, MariaDB 10.4, and PHP7.3-FPM on Ubuntu 19.04 LTS.
This guide can also be applied to previous versions of Ubuntu LTS, including Ubuntu 16.04 and 18.04 LTS.
1. Install Required Packages
Login to the SSH terminal with root privileges, then update the Ubuntu system and install the necessary packages.
$ apt-get update
$ apt-get upgrade
$ apt-get dist-upgrade
$ apt-get install software-properties-common -y
$ apt-get install nano wget telnet screen zip unzip -y2. Setup Nginx with FastCGI-Cache Module
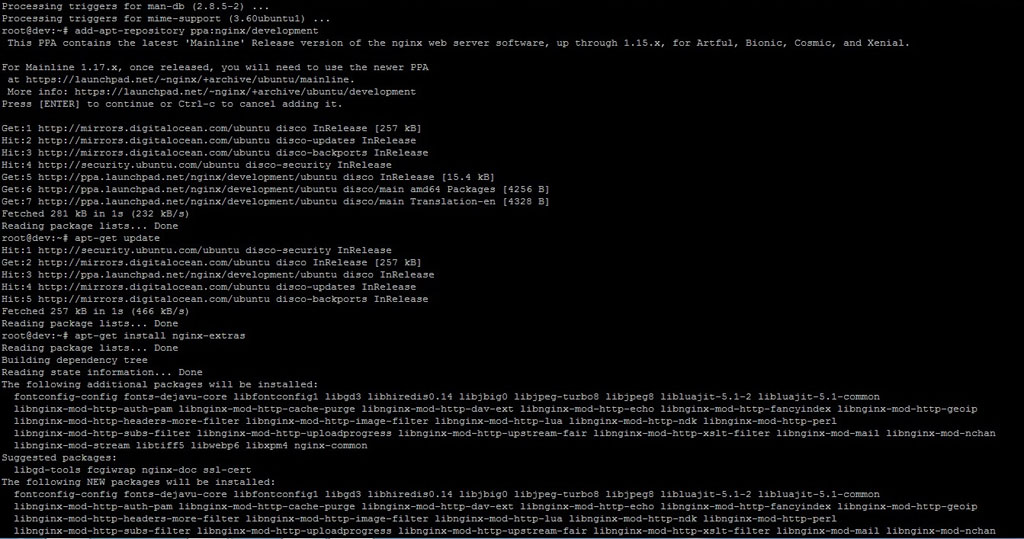
To install and setup Nginx with the FastCGI-Cache module, we will use the Nginx mainline branch (with nginx-extras).
So we need to add the Nginx PPA Launchpad to our Ubuntu system. The reason why we insist on using the Nginx mainline branch instead of the stable branch, please read our previous article.
We use nginx-extras with this mainline branch, since nginx-extras has included the libnginx-mod-http-cache-purge module which is required to purging the FastCGI-Cache.
$ add-apt-repository ppa:nginx/development
$ apt-get update
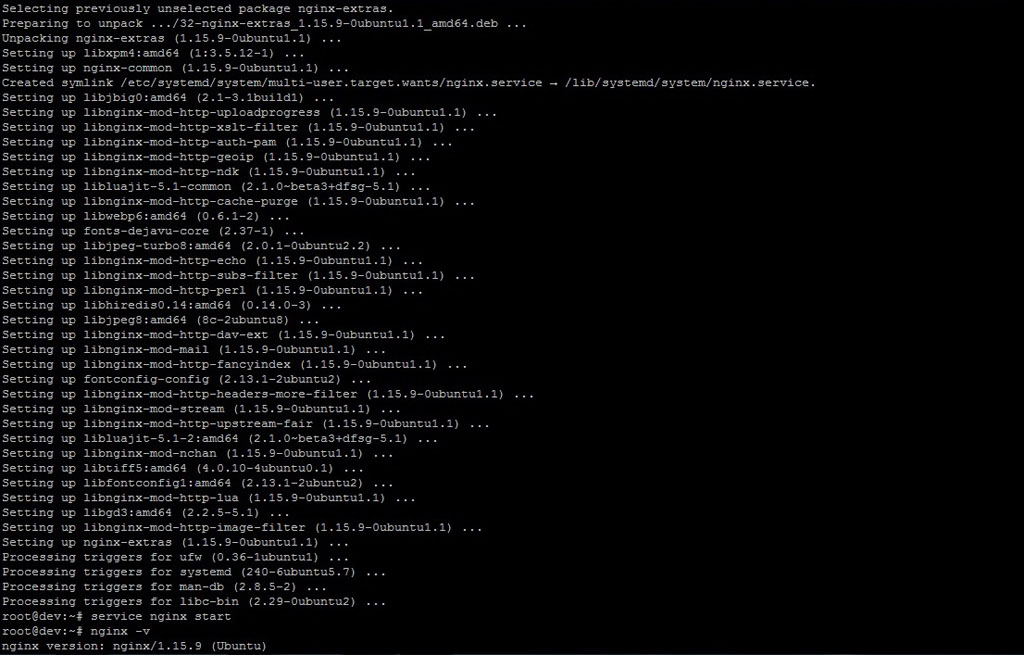
$ apt-get install nginx-extrasCheck Nginx Version
root@dev:~# nginx -v
nginx version: nginx/1.15.9 (Ubuntu)
3. Let’s Create a Folder to Store the Cache File
After that, we need to create a special folder to store all cache files which are generated by the FastCGI-Cache module. Here we will create a fastcgi-cache folder under the /var/nginx directory.
$ mkdir -p /var/nginx/fastcgi-cache4. Configure FastCGI-Cache Module to run with Nginx
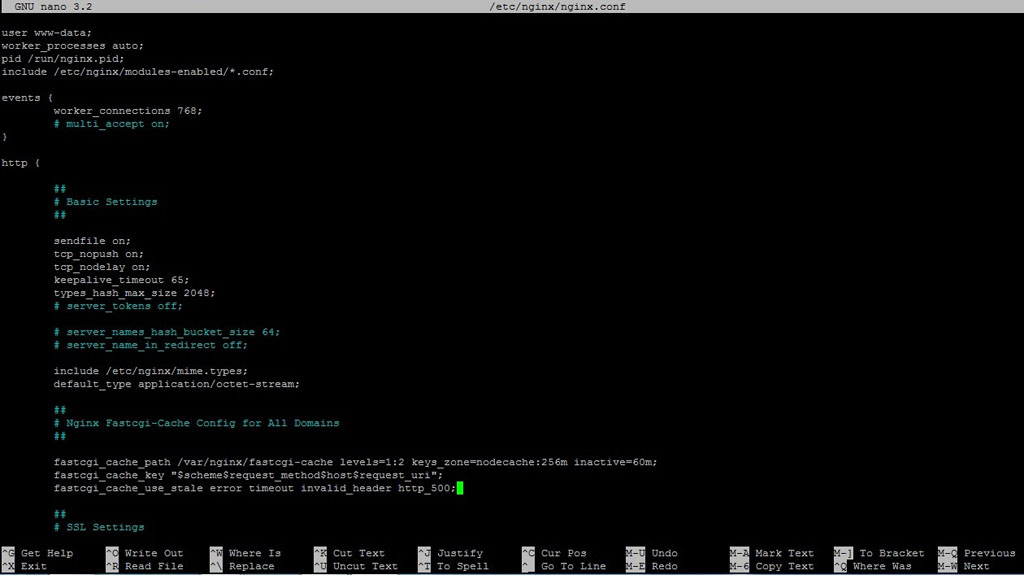
In order to make Nginx run with FastCGI-Cache, we need to add the following config to the nginx.conf file. Please make sure to add the following config under the http { block inside nginx.conf file.
$ nano /etc/nginx/nginx.conf ##
# Nginx Fastcgi-Cache Config for All Domains
##
fastcgi_cache_path /var/nginx/fastcgi-cache levels=1:2 keys_zone=nodecache:256m inactive=60m;
fastcgi_cache_key "$scheme$request_method$host$request_uri";
fastcgi_cache_use_stale error timeout invalid_header http_500;Test Nginx Configuration File
root@dev:~# nginx -t
nginx: the configuration file /etc/nginx/nginx.conf syntax is ok
nginx: configuration file /etc/nginx/nginx.conf test is successful
Restart Nginx Web Server
$ service nginx restart5. Install PHP 7.3 with FastCGI Process Manager (FPM)
As an alternative PHP FastCGI implementation, PHP-FPM offers improved performance, better efficiency, and it’s really capable of handling busy sites.
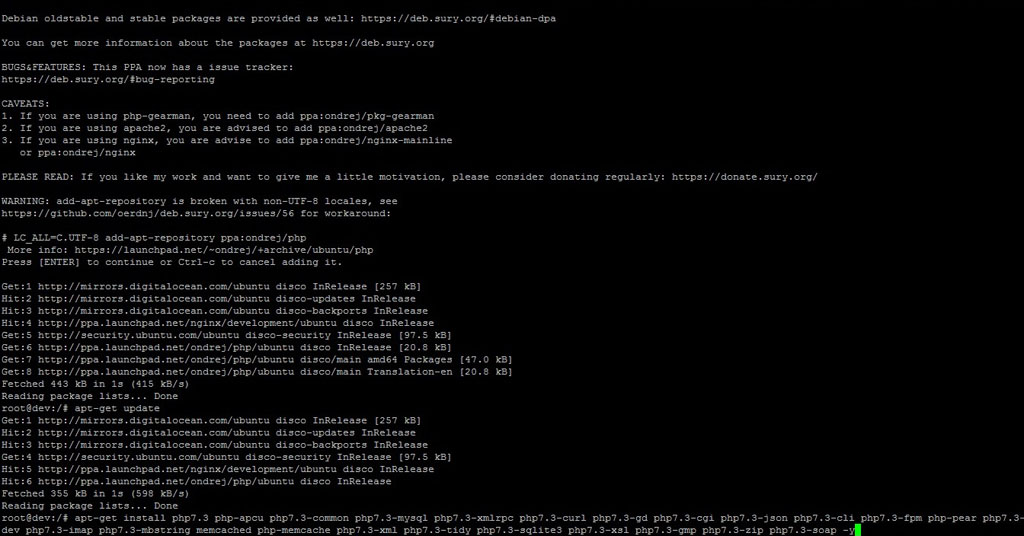
To install PHP7.3-FPM we need to add Ondrej Surý PPA to our Ubuntu 19.04 LTS system.
$ LC_ALL=C.UTF-8 add-apt-repository ppa:ondrej/php
$ apt-get update
Let’s Install PHP7.3-FPM
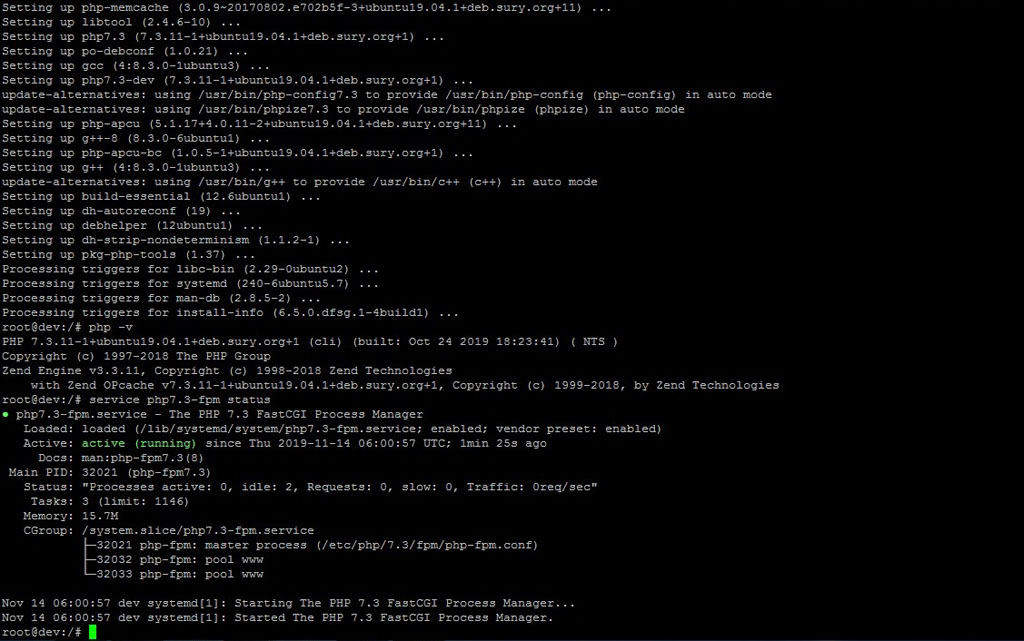
$ apt-get install php7.3 php-apcu php7.3-common php7.3-mysql php7.3-xmlrpc php7.3-curl php7.3-gd php7.3-cgi php7.3-json php7.3-cli php7.3-fpm php-pear php7.3-dev php7.3-imap php7.3-mbstring memcached php-memcache php7.3-xml php7.3-tidy php7.3-sqlite3 php7.3-xsl php7.3-gmp php7.3-zip php7.3-soapCheck PHP Version
root@dev:/# php -v
PHP 7.3.11-1+ubuntu19.04.1+deb.sury.org+1 (cli) (built: Oct 24 2019 18:23:41) ( NTS )
Copyright (c) 1997-2018 The PHP Group
Zend Engine v3.3.11, Copyright (c) 1998-2018 Zend Technologies
    with Zend OPcache v7.3.11-1+ubuntu19.04.1+deb.sury.org+1, Copyright (c) 1999-2018, by Zend Technologies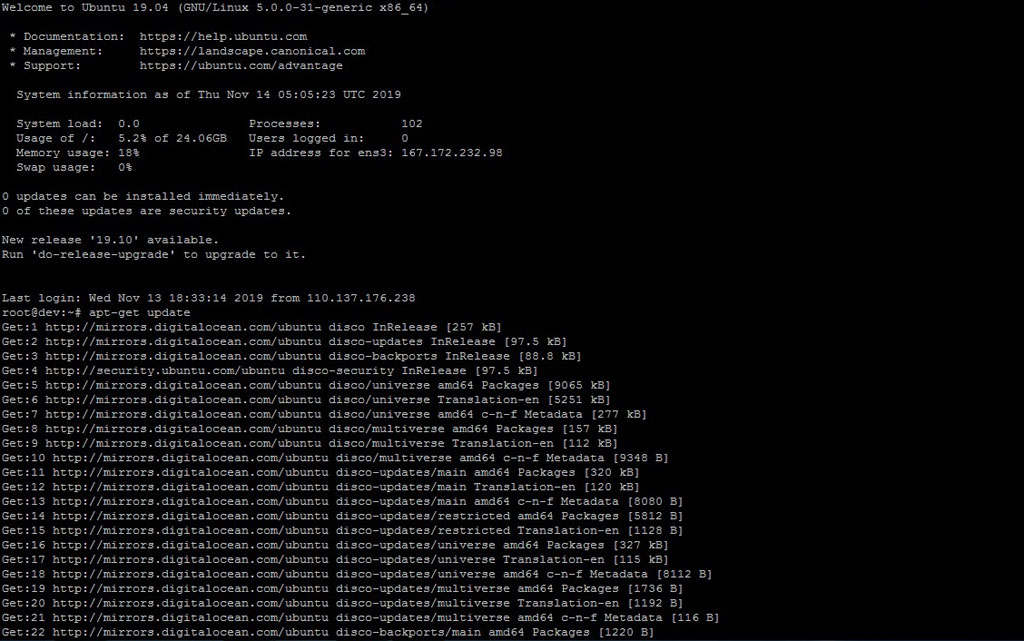
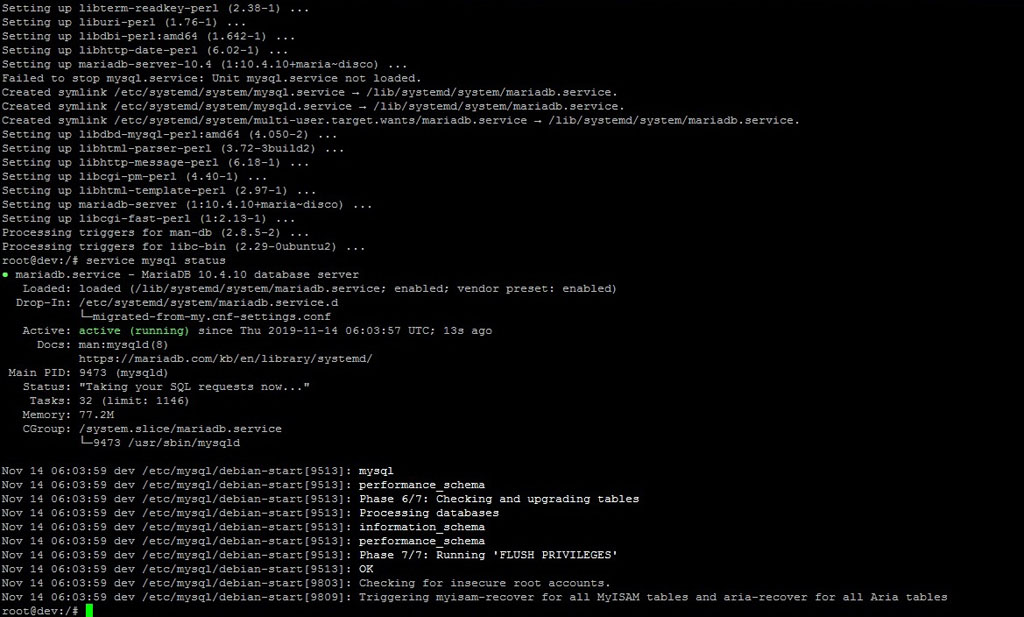
6. Install and Configure MariaDB 10.4 Database Server
In step-4 we will install and configure the latest stable version of MariaDB 10.4 via the official MariaDB repository.
Simply run the following command to install MariaDB 10.4 on your Ubuntu server.
$ apt-key adv --recv-keys --keyserver hkp://keyserver.ubuntu.com:80 0xF1656F24C74CD1D8
$ add-apt-repository 'deb [arch=amd64] http://nyc2.mirrors.digitalocean.com/mariadb/repo/10.4/ubuntu disco main'
$ apt update
$ apt install mariadb-server
Securing MariaDB 10.4 Installation
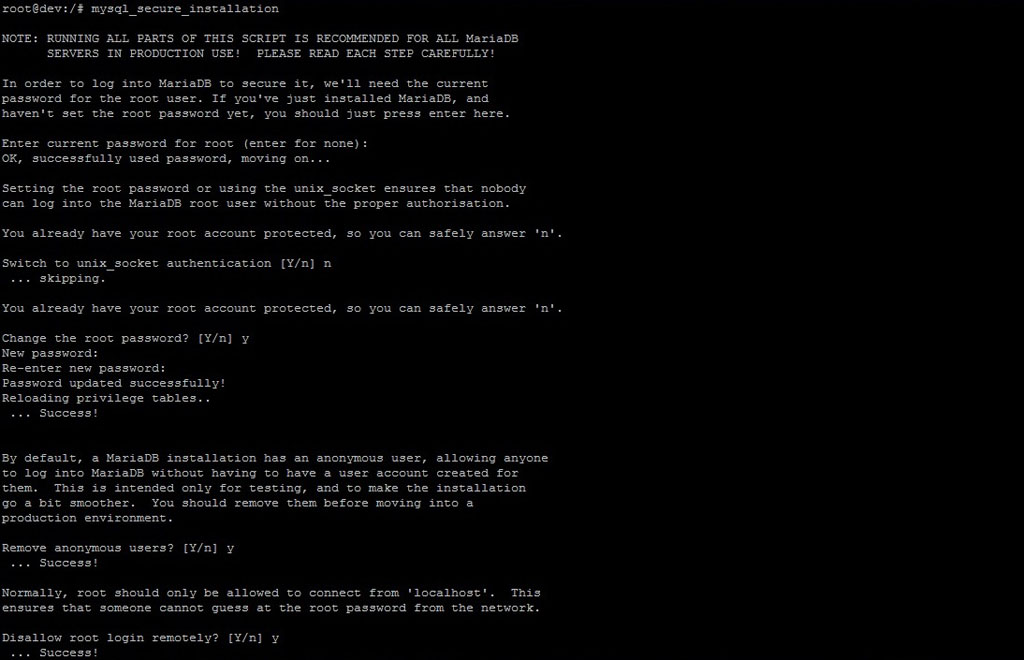
$ mysql_secure_installation7. Let’s Install WordPress
After everything is ready, we can go to the next step to install WordPress. We use the subdomain dev.node35.com in this tutorial, so make sure to replace it with your actual domain name.
$ mkdir -p /var/www/dev.node35.com/public/ /var/www/dev.node35.com/logs/
$ cd /var/www/dev.node35.com/public/
$ wget https://wordpress.org/latest.tar.gz
$ tar --strip-components=1 -xvf latest.tar.gz
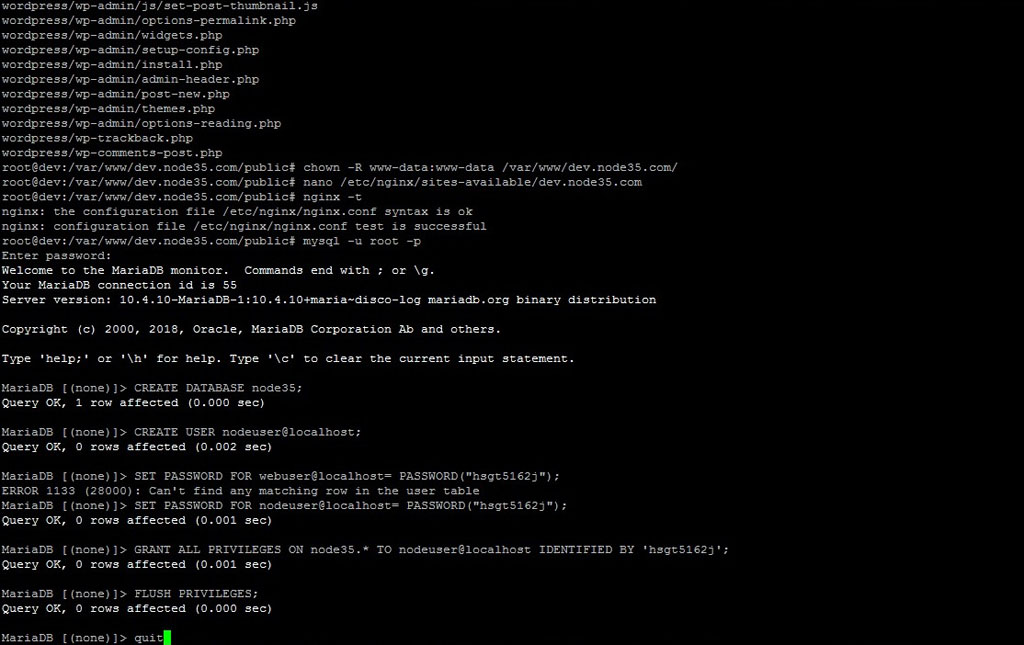
$ chown -R www-data:www-data /var/www/dev.node35.com/8. Create Nginx ServerBlock for your Domain (Virtual Hosts)
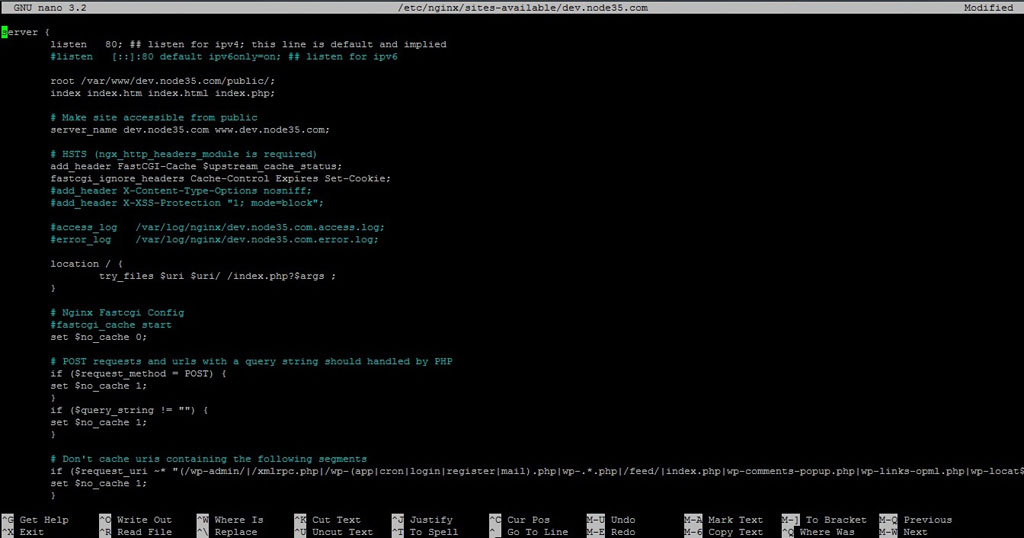
$ nano /etc/nginx/sites-available/dev.node35.comserver {
listen 80; ## listen for ipv4; this line is default and implied
#listen [::]:80 default ipv6only=on; ## listen for ipv6
root /var/www/dev.node35.com/public/;
index index.htm index.html index.php;
# Make site accessible from public
server_name dev.node35.com www.dev.node35.com;
# HSTS (ngx_http_headers_module is required)
add_header FastCGI-Cache $upstream_cache_status;
fastcgi_ignore_headers Cache-Control Expires Set-Cookie;
#add_header X-Content-Type-Options nosniff;
#add_header X-XSS-Protection "1; mode=block";
access_log /var/log/nginx/dev.node35.com.access.log;
error_log /var/log/nginx/dev.node35.com.error.log;
location / {
try_files $uri $uri/ /index.php?$args ;
}
# Nginx Fastcgi Config
#fastcgi_cache start
set $no_cache 0;
# POST requests and urls with a query string should handled by PHP
if ($request_method = POST) {
set $no_cache 1;
}
if ($query_string != "") {
set $no_cache 1;
}
# Don't cache uris containing the following segments
if ($request_uri ~* "(/wp-admin/|/xmlrpc.php|/wp-(app|cron|login|register|mail).php|wp-.*.php|/feed/|index.php|wp-comments-popup.php|wp-links-opml.php|wp-locations.php|sitemap(_index)?.xml|[a-z0-9_-]+-sitemap([0-9]+)?.xml)") {
set $no_cache 1;
}
# Don't use the cache for logged in users or recent commenters
if ($http_cookie ~* "comment_author|wordpress_[a-f0-9]+|wp-postpass|wordpress_no_cache|wordpress_logged_in") {
set $no_cache 1;
}
# Fastcgi-Cache Config
location ~ \.php$ {
try_files $uri =404;
#fastcgi_pass 127.0.0.1:9000;
fastcgi_pass unix:/run/php/php7.3-fpm.sock;
include fastcgi_params;
include fastcgi.conf;
fastcgi_param HTTP_PROXY "";
fastcgi_index index.php;
# fastcgi_intercept_errors on;
fastcgi_cache_bypass $no_cache;
fastcgi_no_cache $no_cache;
fastcgi_cache nodecache;
fastcgi_cache_valid 200 60m;
}
# Fastcgi-Purge Config
location ~ /purge(/.*) {
# Uncomment the following two lines to allow purge only from the webserver
#allow 127.0.0.1;
#deny all;
fastcgi_cache_purge nodecache "$scheme$request_method$host$1";
}
location ~ /.well-known {
allow all;
}
# Static Cache Config
location ~* ^.+\.(ogg|ogv|svg|svgz|eot|otf|woff|mp4|ttf|rss|atom|jpg|jpeg|gif|png|ico|css|js|zip|tgz|gz|rar|bz2|doc|xls|exe|ppt|tar|mid|midi|wav|bmp|rtf)$ {
access_log off; log_not_found off; expires 360d;
add_header Access-Control-Allow-Origin "*";
}
location = /robots.txt { access_log off; log_not_found off; }
location ~ ^/\.user\.ini {
deny all;
}
# XML Sitemap
rewrite ^/sitemap(-+([a-zA-Z0-9_-]+))?\.xml$ "/index.php?xml_sitemap=params=$2" last;
rewrite ^/sitemap(-+([a-zA-Z0-9_-]+))?\.xml\.gz$ "/index.php?xml_sitemap=params=$2;zip=true" last;
rewrite ^/sitemap(-+([a-zA-Z0-9_-]+))?\.html$ "/index.php?xml_sitemap=params=$2;html=true" last;
rewrite ^/sitemap(-+([a-zA-Z0-9_-]+))?\.html.gz$ "/index.php?xml_sitemap=params=$2;html=true;zip=true" last;
}9. Create Symbolic Links to sites-enabled Directory
$ ln -s /etc/nginx/sites-available/dev.node35.com /etc/nginx/sites-enabled/
$ ln -s /var/log/nginx/dev.node35.com.access.log /var/www/dev.node35.com/logs/access.log
$ ln -s /var/log/nginx/dev.node35.com.error.log /var/www/dev.node35.com/logs/error.log
Test Nginx Configuration Again
root@dev:/var/www/dev.node35.com/public# nginx -t
nginx: the configuration file /etc/nginx/nginx.conf syntax is ok
nginx: configuration file /etc/nginx/nginx.conf test is successful
root@dev:/var/www/dev.node35.com/public#
10. Create Database and Users
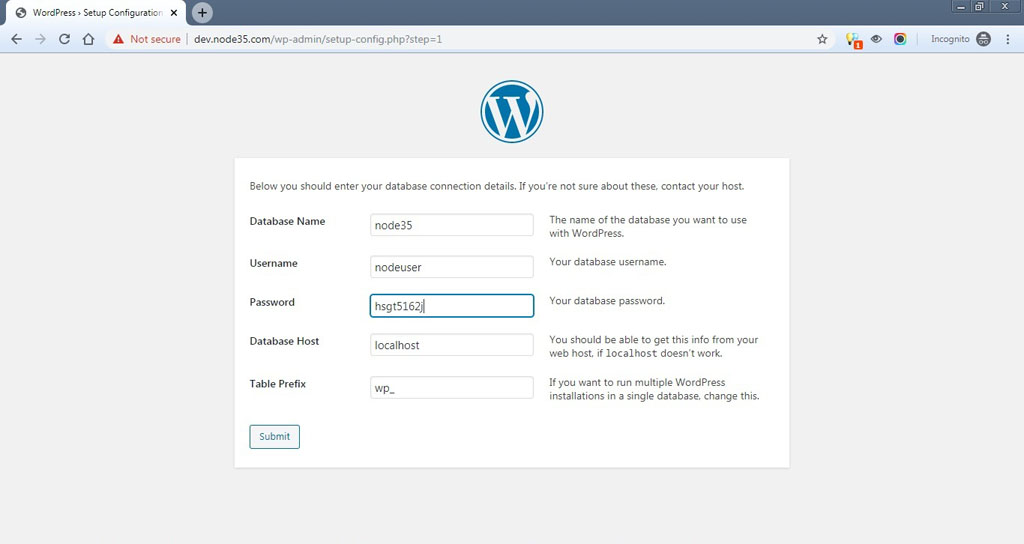
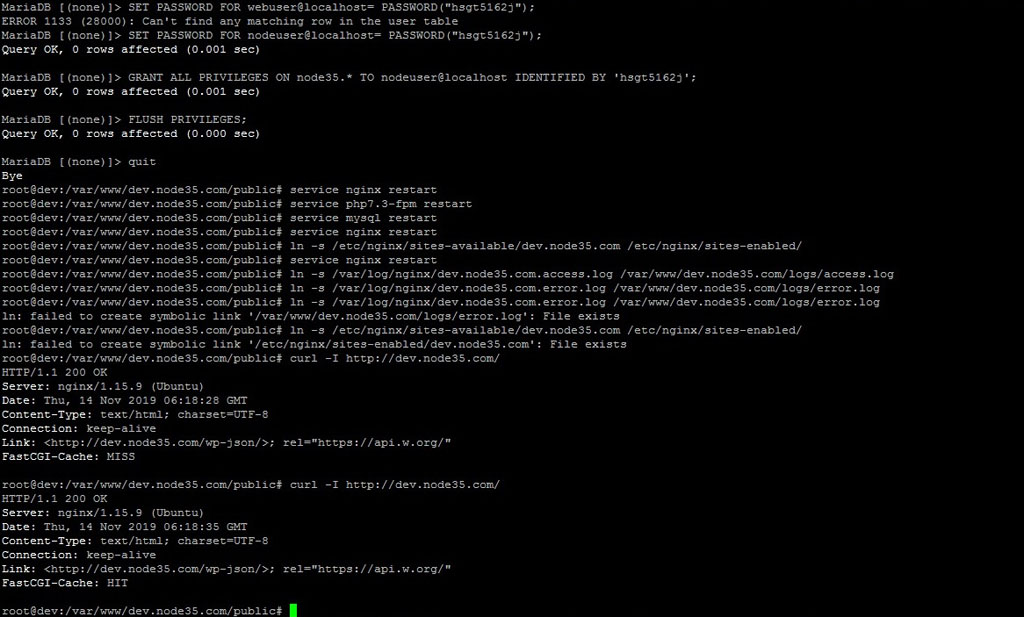
$ mysql -u root -p$ CREATE DATABASE node35;
$ CREATE USER nodeuser@localhost;
$ SET PASSWORD FOR nodeuser@localhost= PASSWORD("hsgt5162j");
$ GRANT ALL PRIVILEGES ON node35.* TO nodeuser@localhost IDENTIFIED BY 'hsgt5162j';
$ FLUSH PRIVILEGES;
$ quit11. Restart All Services
$ service nginx restart
$ service php7.3-fpm restart
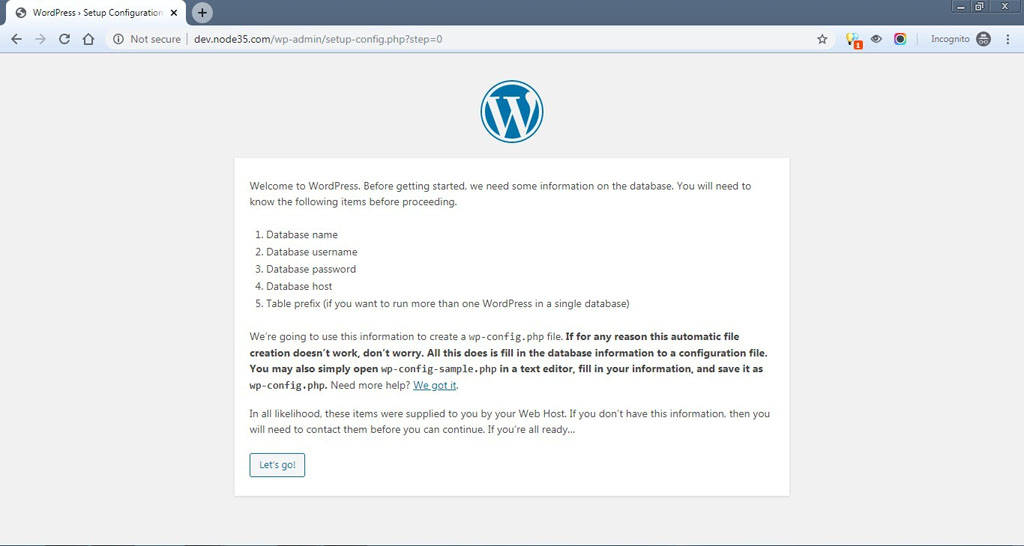
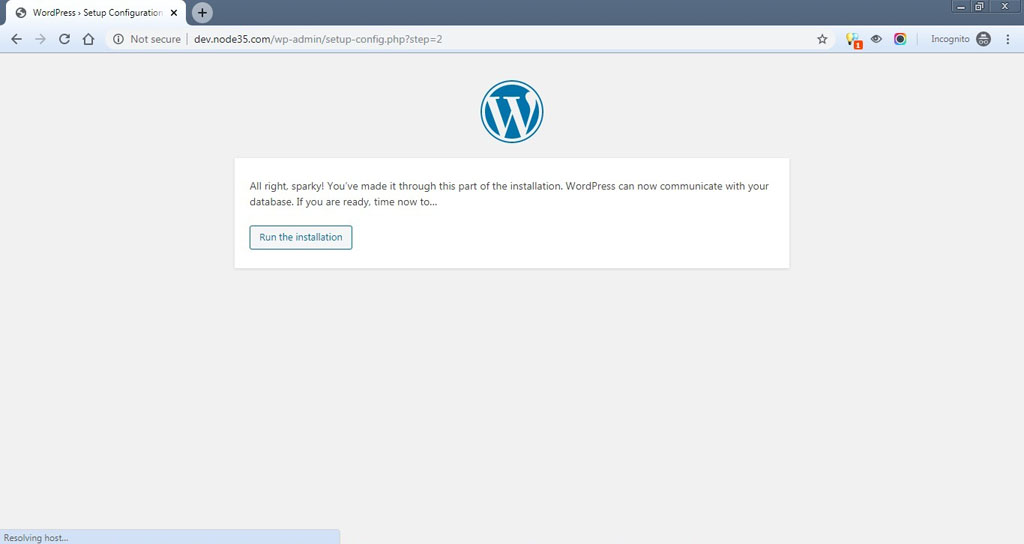
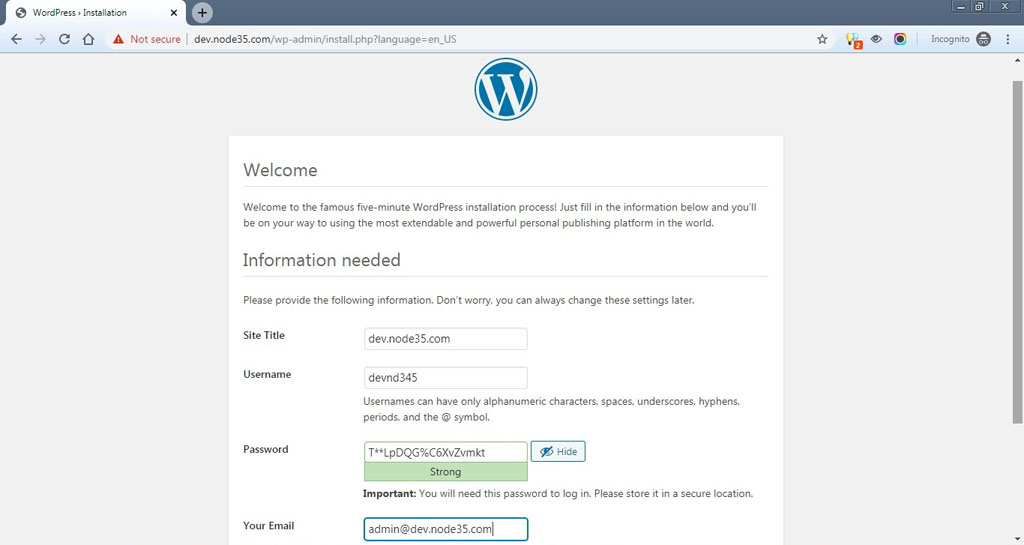
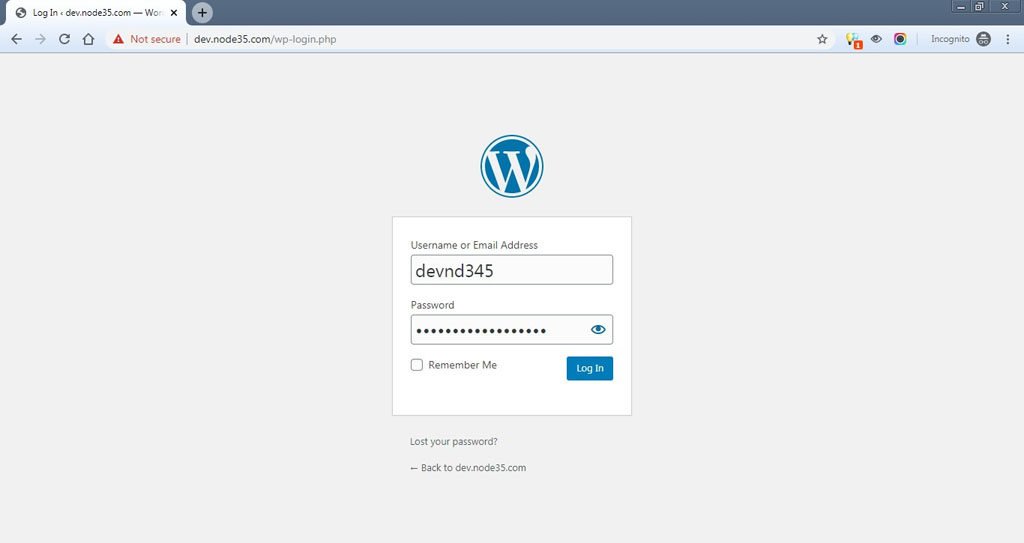
$ service mysql restart12. Run WordPress Installation in your Browser
Since we’ve installed WordPress manually, we must input the db name, db user, and password on the WordPress installation page.
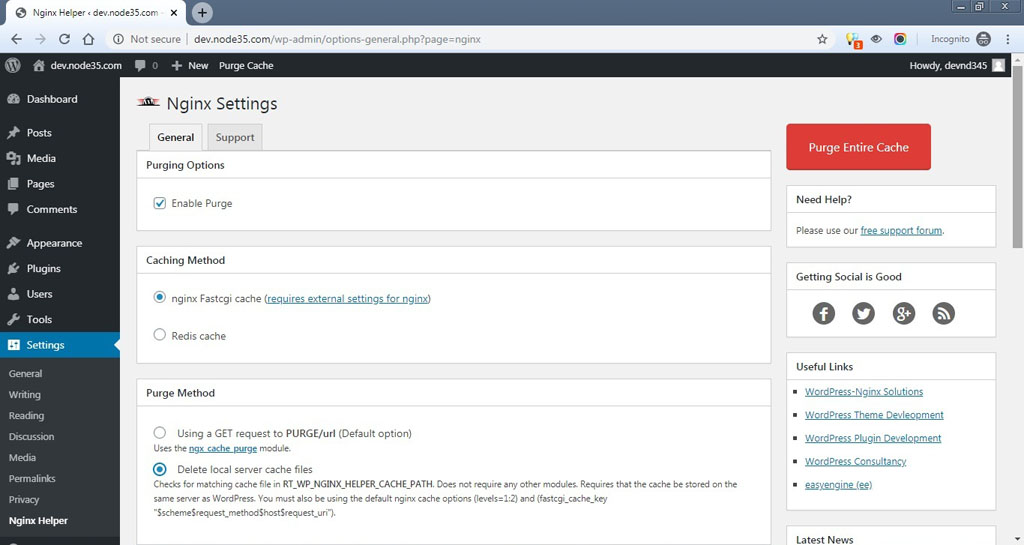
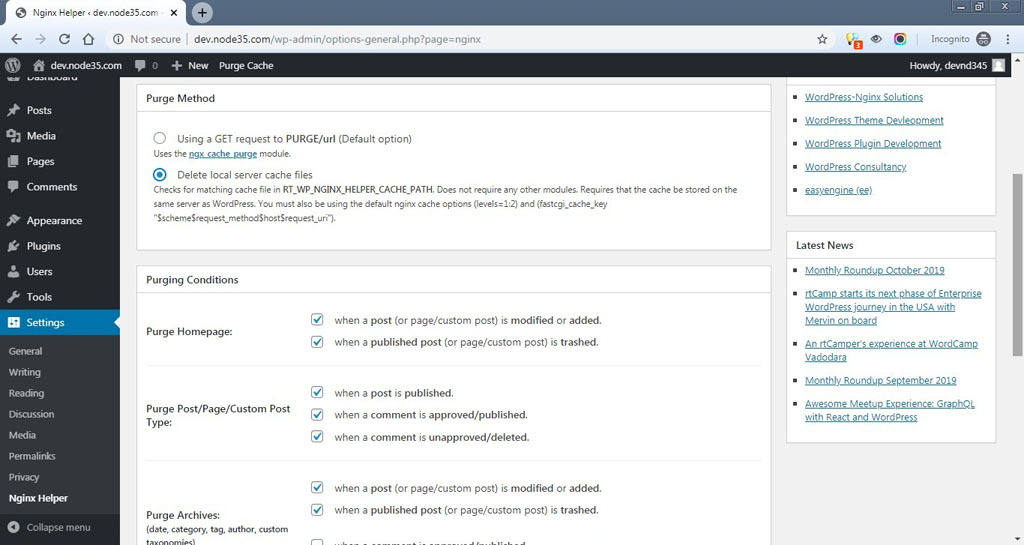
13. Install and Setup Nginx Helper Plugin to Clear Cache
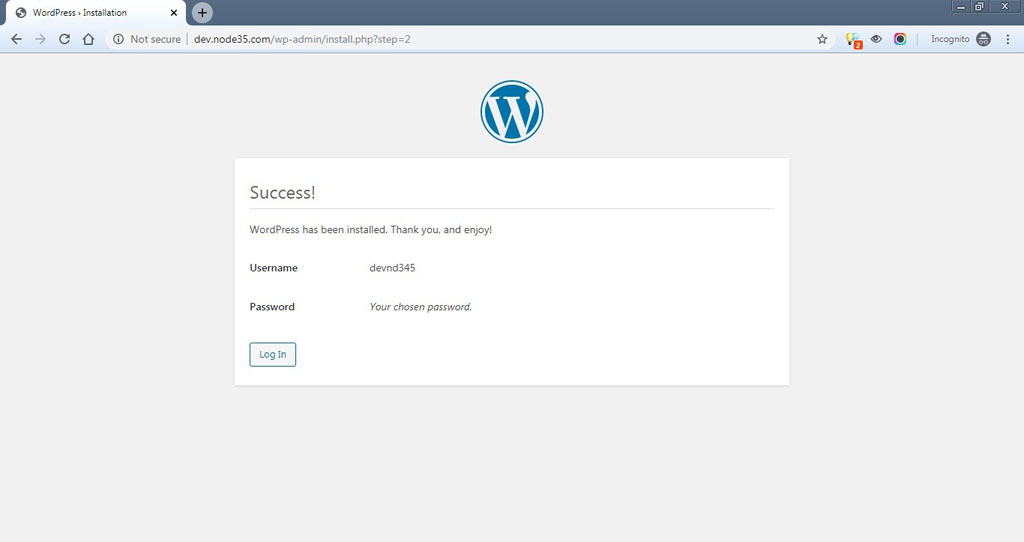
After we successfully installed WordPress, we need to login to WP-Admin to install and configure the Nginx Helper plugin.
This plugin supports for purging the Nginx FastCGI-Cache, Redis-Cache and Nginx Proxy Cache. So we can clear cache in one click with this plugin.

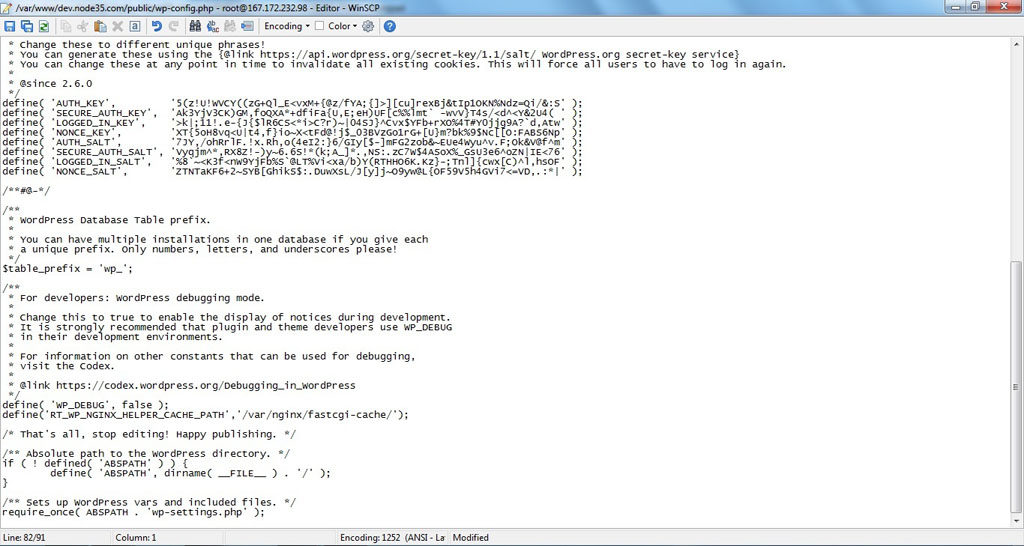
Then edit wp-config.php file and add the following code just before the line /* That's all, stop editing! Happy blogging. */. So Nginx Helper can work to purging the FastCGI-Cache on your site.
$ define('RT_WP_NGINX_HELPER_CACHE_PATH','/var/nginx/fastcgi-cache/');14. Let’s Test FastCGI-Cache
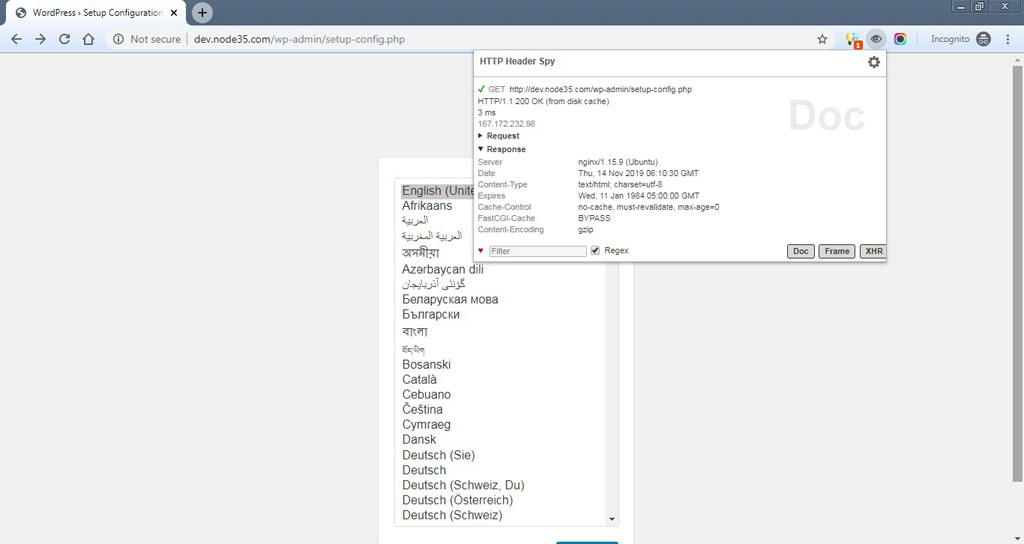
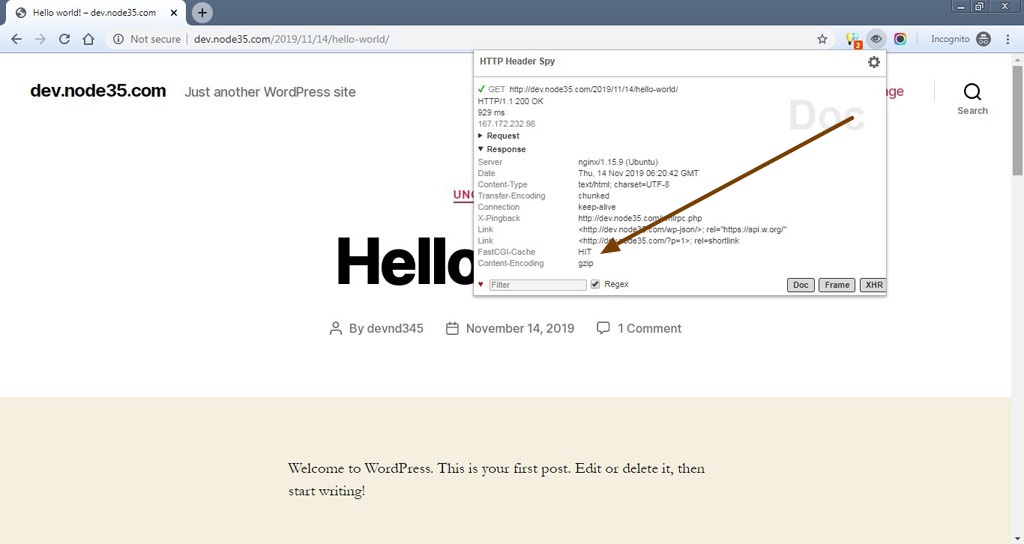
Now, we need to test Nginx FastCGI-Cache on our WP site to find out whether FastCGI-Caching is working properly or not.
We can use the curl -I command in the SSH terminal to check the website header response. We can also use the “HTTP Header Spy” extension to check the response header in the Chrome browser.
root@dev:/var/www/dev.node35.com/public# curl -I http://dev.node35.com/
HTTP/1.1 200 OK
Server: nginx/1.15.9 (Ubuntu)
Date: Thu, 14 Nov 2019 06:18:28 GMT
Content-Type: text/html; charset=UTF-8
Connection: keep-alive
Link: <http://dev.node35.com/wp-json/>; rel="https://api.w.org/"
FastCGI-Cache: MISS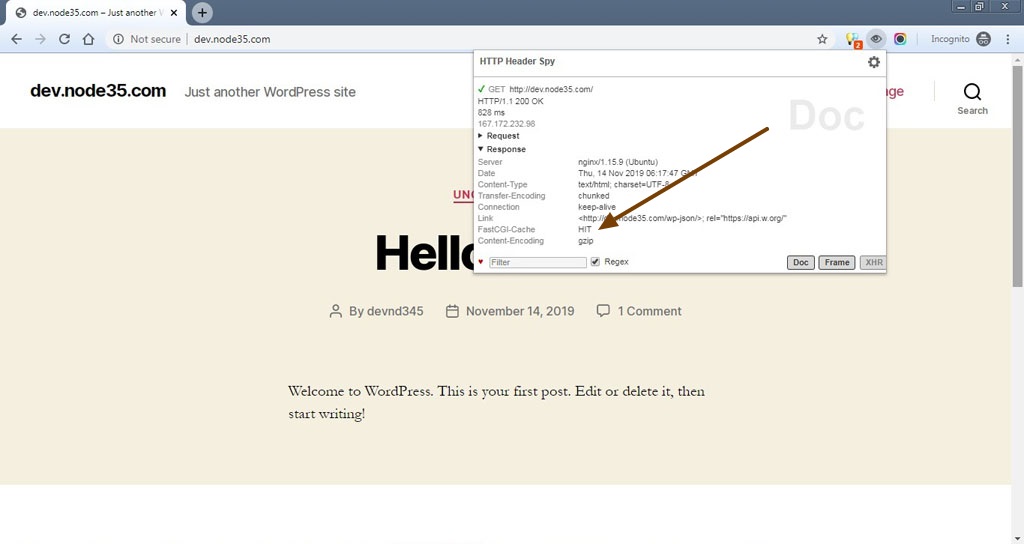
MISS… ? Let’s Test Again
If you see the header response status “FastCGI-Cache: HIT”, that means the Nginx FastCGI-Caching module is working properly on your WordPress site.
If you see the response header status “FastCGI-Cache: MISS”, it means that the cache data has not been stored on the disk and memory zone, so we need to reload the browser again to get the cached version of your site.
However, if the FastCGI-Cache status is still MISS, it means something is wrong with your Nginx FastCGI-Cache configuration.
root@dev:/var/www/dev.node35.com/public# curl -I http://dev.node35.com/
HTTP/1.1 200 OK
Server: nginx/1.15.9 (Ubuntu)
Date: Thu, 14 Nov 2019 06:18:35 GMT
Content-Type: text/html; charset=UTF-8
Connection: keep-alive
Link: <http://dev.node35.com/wp-json/>; rel="https://api.w.org/"
FastCGI-Cache: HIT
15. Reboot Server
OK… All Done, we need to reboot our server, since there’s a Linux kernel update when we run the upgrade command in step-1 above.
$ reboot
We are a bunch of people who are still continue to learn Linux servers. Only high passion keeps pushing us to learn everything.
how to install with php7.4-fpm and using ubuntu 18.04 /64 lts?
thanks