
Start your VPS now with FREE $100 credit.
NGINX is a free, open-source HTTP web server, load balancer, media streaming, and reverse proxy which can be installed on almost all operating system like Linux, Windows, or MacOS. NGINX is known for its high-performance and stability over the Apache web server on the web hosting industry. Currently the latest mainline branch of Nginx is version 1.21.6 which has been released on January 25, 2022.
Well, today I will show you on this guide on how to install NGINX v1.21.6 mainline package on AlmaLinux 8.5. We stick to use Nginx mainline since mainline branch getting more frequently update, more features, major bug fixes, and security maintenance compared to the stable branch of Nginx which only get minnor bug fixes on each release version.
However, before installing Nginx mainline package on AlmaLinux 8.5 make sure to fit the following software requirenment.
PREREQUISITES:
* VPS, CLoud or Bare Metal
* Superuser Privileges (Root Access)
* Server IPv4 Address & Its Password
* Running Under AlmaLinux 8.5 OS
* Gnome Terminal for Linux Desktop
* PuTTy SSH Client for Windows or MacOS
1.) Install Software Dependency
Firts of all, you need to install software or package dependency called “yum-utils” on your node system.
$ yum install yum-utils
2.) Setting Up Nginx Packages Repository
After that let’s add Nginx package repository to your machine, Since AlmaLinux is fully based on Red Hat Enterprise Linux source code, so we can easily use the Installation instructions for RHEL/CentOS on the official Nginx website.
Simply create a new file called “nginx.repo” inside directory of /etc/yum.repos.d/ and then paste the following Nginx YUM Repository for RHEL/CentOS on that file.
$ cd /etc/yum.repos.d/$ nano nginx.repo[nginx-stable] name=nginx stable repo baseurl=http://nginx.org/packages/centos/$releasever/$basearch/ gpgcheck=1 enabled=1 gpgkey=https://nginx.org/keys/nginx_signing.key module_hotfixes=true [nginx-mainline] name=nginx mainline repo baseurl=http://nginx.org/packages/mainline/centos/$releasever/$basearch/ gpgcheck=1 enabled=0 gpgkey=https://nginx.org/keys/nginx_signing.key module_hotfixes=true
3.) Disable Stable Branch and Enable Nginx Mainline Branch
The stable package for Nginx web server is enable by default on Nginx YUM repository. So, if you want to use Nginx mainline branch, instead of stable branch, you need to change value/parameter from “enabled=0” to “enabled=1” on section [nginx-mainline] inside the nginx.repo file. Or simply run the following command.
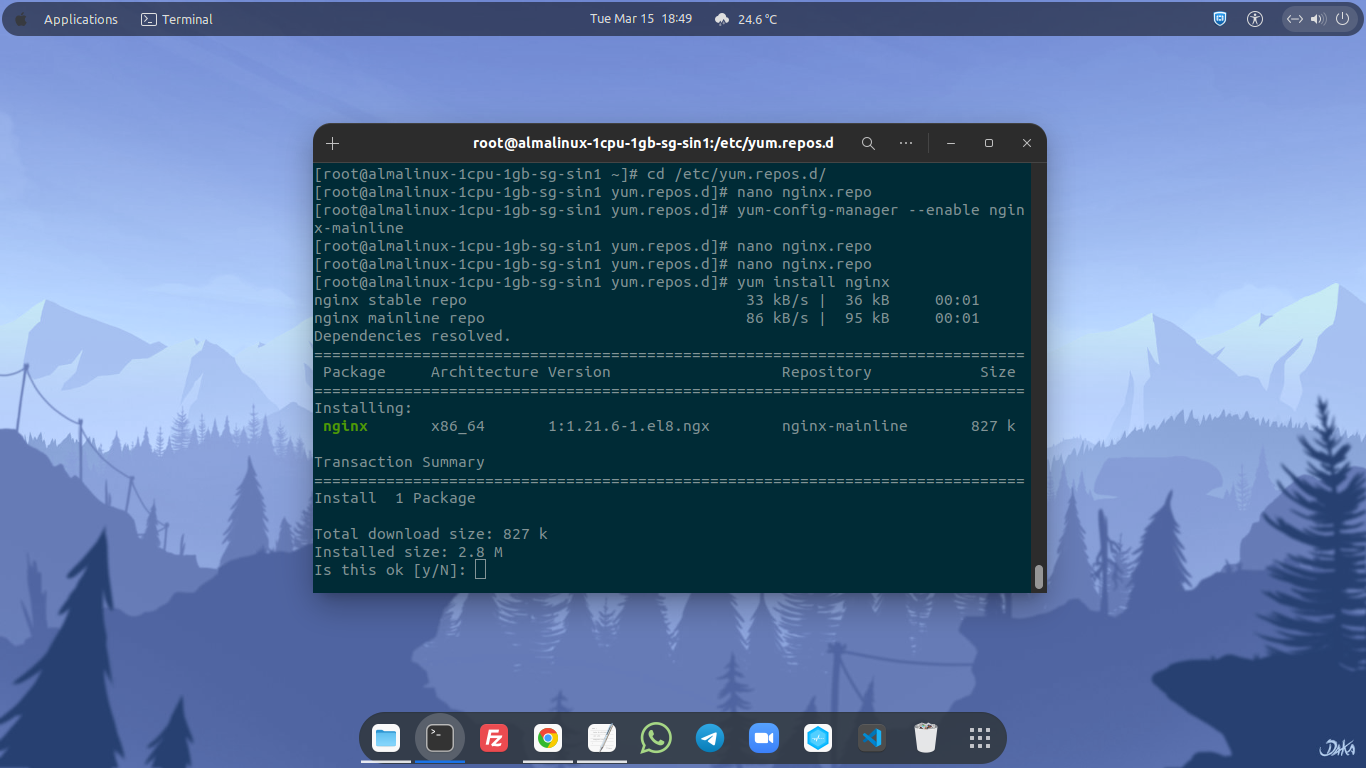
$ yum-config-manager --enable nginx-mainline4.) Let’s Install Nginx Web Server with the Latest Mainline Branch version 1.21.6.
$ yum install nginx5.) Enable, Start and Check Nginx Version Installed on the Node
Enable Nginx to start automatically from boot simply run this command.
$ systemctl enable nginx.service
Created symlink /etc/systemd/system/multi-user.target.wants/nginx.service → /usr/lib/systemd/system/nginx.service.
To Start, Stop and Restart Service or Daemon for Nginx Web Server run the following command.
$ systemctl start nginx.service
$ systemctl stop nginx.service
$ systemctl restart nginx.service
To Check Status of Nginx Service or Daemon run below command.

$ systemctl status nginx.serviceYou can also check your Nginx version with these commands.
$ nginx -V

OR...

$ nginx -v
6.) Disable Firewalld on OS-Level
By default, AlmaLinux 8.5 set the Firewalld to ON or they enabled it by default since the VM deployed with this OS on Upcloud or another cloud or bare-metal provider. So you need to disable this firewall to grant access on all TCP and UDP ports, especially port 80 for HTTP connection and port 443 for SSL or HTTPS connections.
Please note that we can configure the firewall later after you have completed in configuring your node or after the system is ready to use. After that you can setting up the firewall and open or block unnecesary TCP and UDP ports. To stop, disable and check the status of Firewalld on AlmaLinux 8.5 simply run the following commands.

$ systemctl stop firewalld.service

$ systemctl disable firewalld.service
Removed /etc/systemd/system/multi-user.target.wants/firewalld.service.
Removed /etc/systemd/system/dbus-org.fedoraproject.FirewallD1.service.

$ systemctl status firewalld.service
7.) Try to Access Your IPv4 Address or Domain on the Web Browser
After we’ve disable the Firewalld, then you can check and verify that your Nginx web server can be accessed over the public internet via the web browser like Google Chrome or Mozilla Firefox. See the following screenshots, if you found similar result, meaning that you Nginx web server can accessed on port 80 and 443 over the internet.

DONE… from this step you have been successful in installing Nginx web server with its official mainline branch on cloud server running under operating system AlmaLinux 8.5. You can continue to install PHP-FPM and database server like MySQL or MariaDB in order to host your website or blog on your node. Don’t forget to read my another tutorial about installing PHP 8.1-FPM and MySQL 8.0 on AlmaLinux 8.5.
