
Start your VPS now with FREE $100 credit.
Today we will guide you on how to install and configure MySQL 8.0.29 database server on Red Hat Enterprise Linux 8.5 (RHEL). Don’t worry about license, since we will stick to use a free and open-source version of MySQL database server, instead of MySQL Enterprise Edition. So, you don’t need to pay them or buy for the license to use MySQL on your machine.
MySQL 8.0 is a current stable release of the MySQL database server, come as successor for MySQL 5.7 which has been available for a long time in the web hosting industry. As you know that MySQL is the most popular Open Source Relational Database Management System or also called RDBMS. Currently MySQL is developed, distributed and maintenanced by Oracle Corporation.
There are new features added in MySQL 8.0 like data dictionary, Atomic data definition statements (Atomic DDL), upgrade procedure, Security and account management. Unlike MySQL 5.7, the latest stable release of MySQL 8.0 can incorporates a transactional data dictionary which stores information about the database objects. While on the previous version of MySQL, dictionary data are stored in metadata files and non-transactional database tables.

Then you will find atomic DDL statement which combines the data dictionary updates, storage engine operations, and binary-log writes associated with a DDL operation into a single atomic transaction. Other new features added in MySQL 8.0 is a Upgrade Pocedure which is different with the previous version of MySQL database server. After you’ve install a new version of MySQL 8.0+, your machine will automatically performs all necessary upgrade tasks at the next startup of your node server.
So, it’s no longer depends on the manual “mysql_upgrade” command as you can find in the previous versions of MySQL database server, including MySQL 5.7, MySQL 5.6, and MySQL 5.5. On the old-stable release of MySQL (eg, 5.7 or 5.6), after you’ve successfully install a new version of MySQL on your machine, then your MySQL database server will automatically upgrades the data dictionary tables on the next startup. After that, you as a Database Administrator (DBA) is expected to invoke the “mysql_upgrade” command manually in order to upgrade all system db tables in the mysql schema, and database objects in other schemas, including sys schema and user schemas.
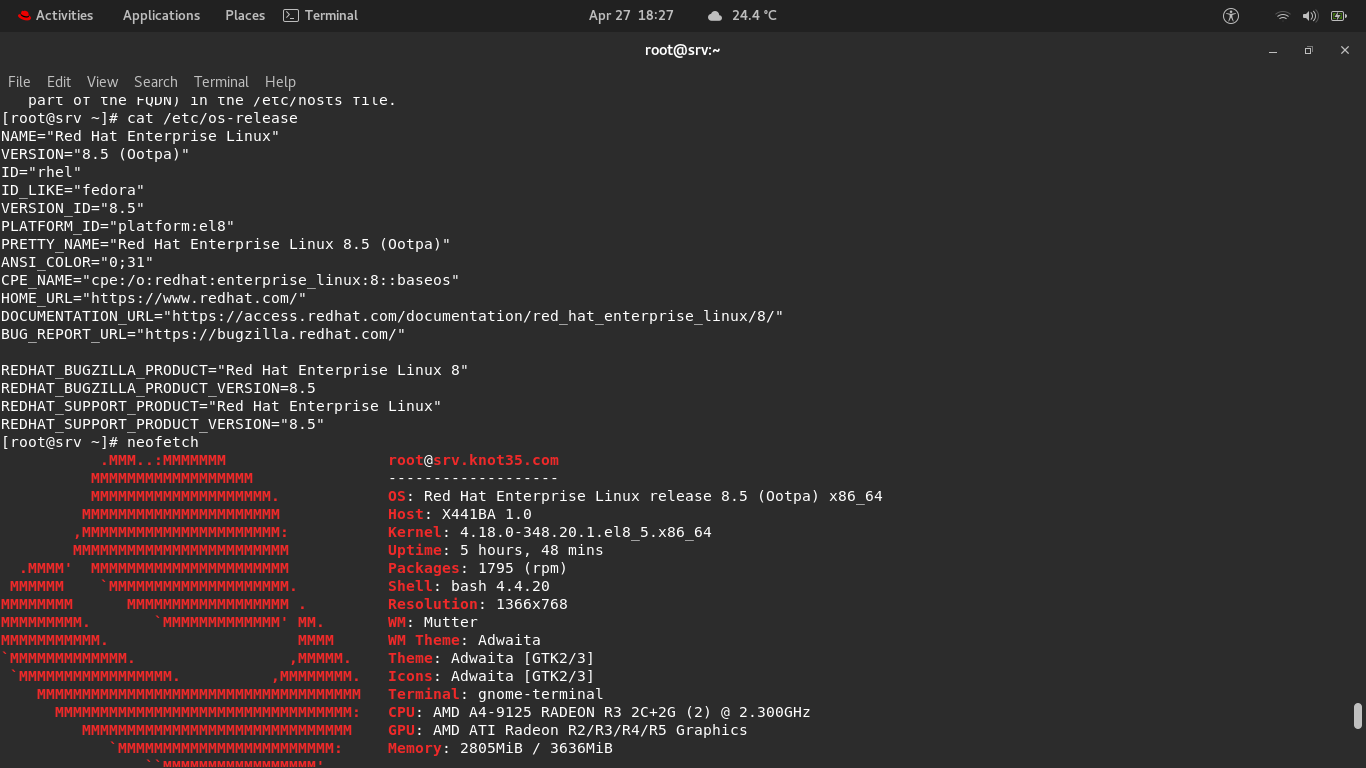
There are also Security and account management, were added to improve security and enable greater DBA flexibility in MySQL 8.0 account management. Well, before installing MySQL 8.0 on your machine, make sure to meet the following requirenments. Please note that we will simulate the MySQL installation procedure on my local machine, which is run under desktop edition of Red Hat Enterprise Linux 8.5 (RHEL).
PREREQUISITES:
* VPS, Cloud or Bare-Metal Server.
* Operating System with Red Hat Enterprise Linux 8.5 (RHEL)
* Server IPv4 Address with Superuser Privileges (Root Access)
* Gnome Terminal for Linux Desktop
* PuTTy SSH Client for Windows or Mac
* Powershell for Windows 10/11
* Familiar with DNF and YUM Commands
1.) Add MySQL Yum Repository into your RHEL Machine
On the first step we should add the MySQL Yum Repository into your RHEL machine before we can install MySQL 8.0. Just for info, MySQL Yum Repository are available for Red Hat based distros a.k.a RHEL derivative or clone versions like Fedora, Oracle Linux, and CentOS. They provides RPM packages like MySQL Server, Client, MySQL Workbench, MySQL Utilities, Connector/ODBC, and much more. This should be done on fresh system or machine with no database server installed on the machine previously.
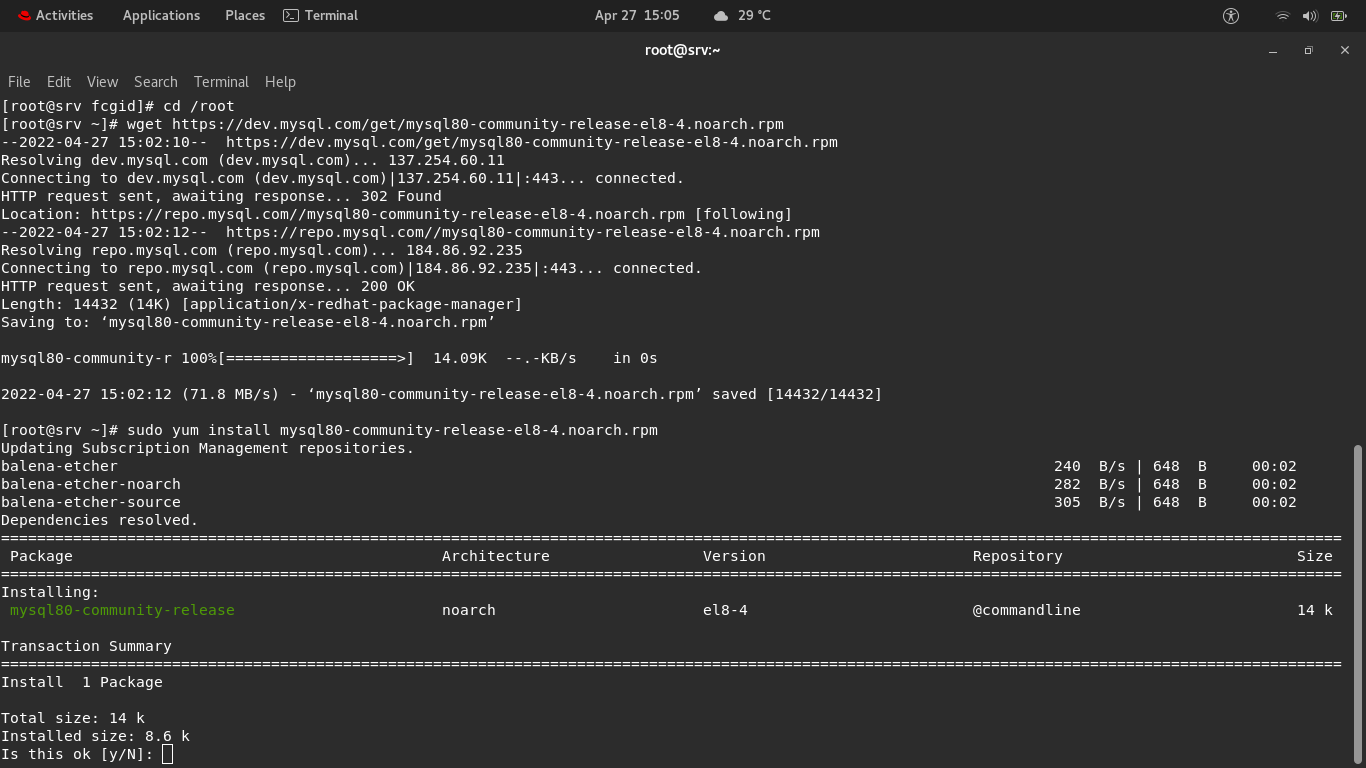
$ sudo su
[sudo] password for fcgid:
$ cd /root
$ wget https://dev.mysql.com/get/mysql80-community-release-el8-4.noarch.rpm
2.) Install Downloaded RPM Package
After that you need to install downloaded RPM release package into your machine. For RHEL8-based system run the following commands:
$ sudo yum install mysql80-community-release-el8-4.noarch.rpm
Make sure to replace “platform-and-version-specific-package-name” with the actual name of the downloaded RPM release package if you’re running other versions of Red Hat, eg RHEL 7 or 6. List of Commands:
* For RHEL8-based distro:
$ sudo yum install mysql80-community-release-el8-{version-number}.noarch.rpm* For RHEL7-based distro:
$ sudo yum install mysql80-community-release-el7-{version-number}.noarch.rpm* For RHEL6-based distro:
$ sudo yum install mysql80-community-release-el6-{version-number}.noarch.rpm3.) Verify and Check MySQL Yum Repository in Your System
After you’ve install downloaded RPM release package above, it will add the MySQL 8.0 Yum Repository to your RHEL8 repository list and it also downloads the GnuPG key to check the integrity of the software packages. You can check and verify that the MySQL Yum Repository has been successfully added to your system with the following command.
$ yum repolist enabled | grep "mysql.*-community.*"
mysql-connectors-community MySQL Connectors Community
mysql-tools-community MySQL Tools Community
mysql80-community MySQL 8.0 Community Server
4.) Choose a Release Series of MySQL
You can check using the following commands to see all available different release series of the MySQL Community Server which is hosted in different subrepositories on your system.
$ yum repolist all | grep mysql
mysql-cluster-8.0-community disabled
mysql-cluster-8.0-community-debuginfo disabled
mysql-cluster-8.0-community-source disabled
mysql-connectors-community enabled
mysql-connectors-community-debuginfo disabled
mysql-connectors-community-source disabled
mysql-tools-community enabled
mysql-tools-community-debuginfo disabled
mysql-tools-community-source disabled
mysql-tools-preview disabled
mysql-tools-preview-source disabled
mysql80-community enabled
mysql80-community-debuginfo disabled
mysql80-community-source disabled
By default, the latest GA release of MySQL 8.0 is selected for installation, so no configuration is needed. However, if you want to use another version of MySQL (eg, MySQL 5.7), you need to disabled MySQL 8.0 first via MySQL Yum repository, then enabled MySQL 5.7. But you need to install and download RPM release package of MySQL 5.7 for RHEL 8.5.

If you want to stick on MySQL 8.0 you can skip this step and kindly moving forward to the next step to install MySQL 8.0 on your Red Hat Enterprise Linux 8.5.
$ sudo yum-config-manager --disable mysql80-community
$ sudo yum-config-manager --enable mysql57-community
For DNF-Enabled Systems:
$ sudo dnf config-manager --disable mysql80-community
$ sudo dnf config-manager --enable mysql57-community
Please note that you can also manually edit a MySQL Repository file called “mysql-community.repo” inside /etc/yum.repos.d/ directory. Well, to enable some of the available repository or its subrepository in mysql-community.repo simply edit enabled option from “enabled=0” to “enabled=1”. However, if you want to disabled it simply change from “enabled=1” to “enabled=0”. As you can see on the following snippet code:
$ nano /etc/yum.repos.d/mysql-community.repo
------------------------------------------------------------------------------------------

[mysql80-community]
name=MySQL 8.0 Community Server
baseurl=http://repo.mysql.com/yum/mysql-8.0-community/el/8/$basearch/
enabled=1
gpgcheck=1
gpgkey=file:///etc/pki/rpm-gpg/RPM-GPG-KEY-mysql-2022
file:///etc/pki/rpm-gpg/RPM-GPG-KEY-mysql

[mysql-connectors-community]
name=MySQL Connectors Community
baseurl=http://repo.mysql.com/yum/mysql-connectors-community/el/8/$basearch/
enabled=1
gpgcheck=1
gpgkey=file:///etc/pki/rpm-gpg/RPM-GPG-KEY-mysql-2022
file:///etc/pki/rpm-gpg/RPM-GPG-KEY-mysql

[mysql-tools-community]
name=MySQL Tools Community
baseurl=http://repo.mysql.com/yum/mysql-tools-community/el/8/$basearch/
enabled=1
gpgcheck=1
gpgkey=file:///etc/pki/rpm-gpg/RPM-GPG-KEY-mysql-2022
file:///etc/pki/rpm-gpg/RPM-GPG-KEY-mysql

[mysql-tools-preview]
name=MySQL Tools Preview
baseurl=http://repo.mysql.com/yum/mysql-tools-preview/el/8/$basearch/
enabled=0
gpgcheck=1
gpgkey=file:///etc/pki/rpm-gpg/RPM-GPG-KEY-mysql-2022
file:///etc/pki/rpm-gpg/RPM-GPG-KEY-mysql

[mysql-cluster-8.0-community]
name=MySQL Cluster 8.0 Community
baseurl=http://repo.mysql.com/yum/mysql-cluster-8.0-community/el/8/$basearch/
enabled=0
gpgcheck=1
gpgkey=file:///etc/pki/rpm-gpg/RPM-GPG-KEY-mysql-2022
file:///etc/pki/rpm-gpg/RPM-GPG-KEY-mysql

------------------------------------------------------------------------------------------
5.) Disable Default MySQL Module on EL8-Based Systems
We have to disabling the default MySQL module which is enabled by default on EL8-Based Distros (EL8 systems only), including Red Hat Enterprise Linux 8 (RHEL), Oracle Linux 8, AlmaLinux OS 8.5 and Rocky Linux 8.5. It will masks software packages provided by official MySQL repositories. So we must disable this module and make the official MySQL repository packages is visible, simply run the following commands.
$ sudo yum module disable mysql
Don’t forget to replace “yum” command with “dnf” commands if you currently running RHEL8 OS with dnf-enabled systems.
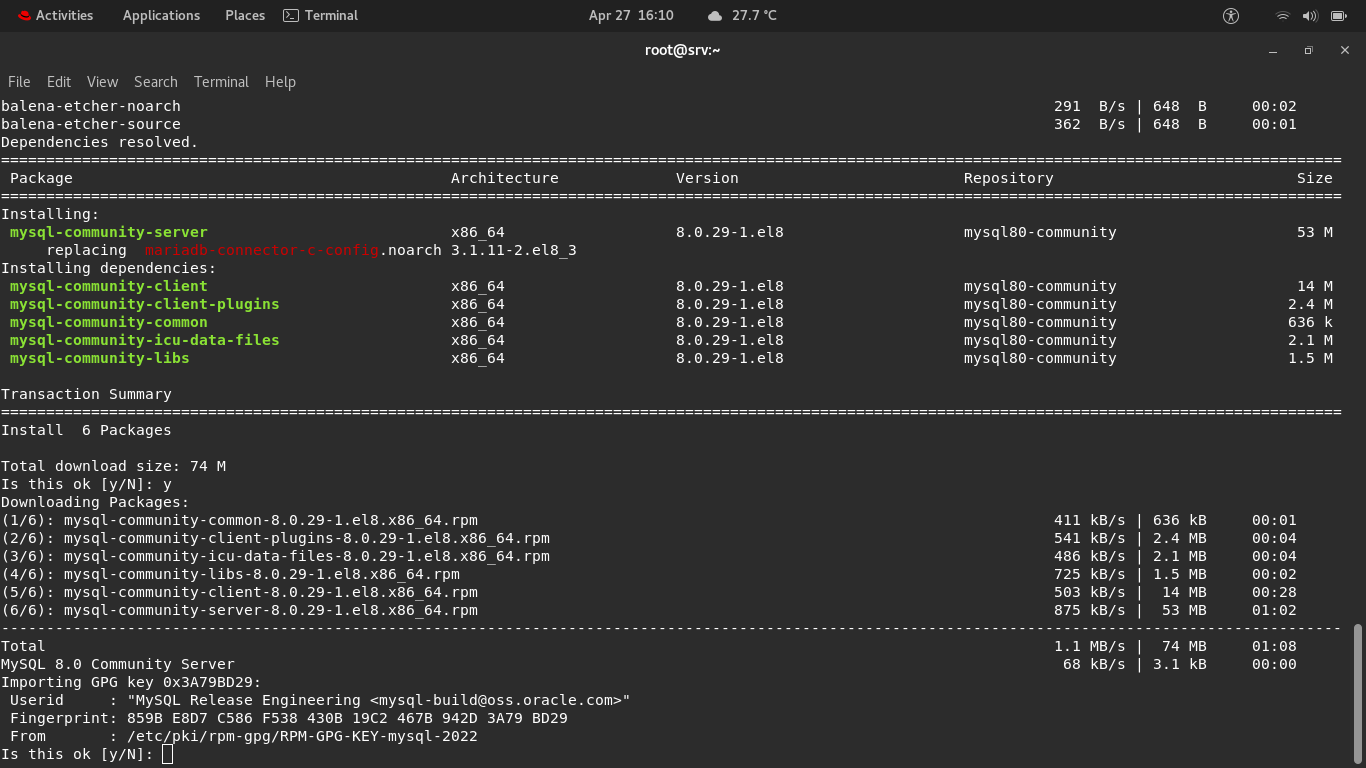
6.) Install MySQL 8.0 Database Server
After you’ve disabling default MySQL module, we can continue to the next step to install MySQL 8.0 Community Server Edition. This will install some packages for MySQL server (mysql-community-server), MySQL client (mysql-community-client), shared client libraries (mysql-community-libs), common error messages and character sets for the MySQL client and MySQL server (mysql-community-common). You can also use “dnf” command to install MySQL 8.0 database server.
$ sudo yum install mysql-community-server
7.) Start, Stop, Restart and Check Status of MySQLD Service
This is basic commands to manage MySQL Database Server, so you have to familiar with these command. From start, stop, restart and check the status of the MySQL server service, either it running or stopped.
To start the MySQL server:
$ systemctl start mysqld
To stop the MySQL server:
$ systemctl stop mysqld
To restart the MySQL server:
$ systemctl restart mysqld
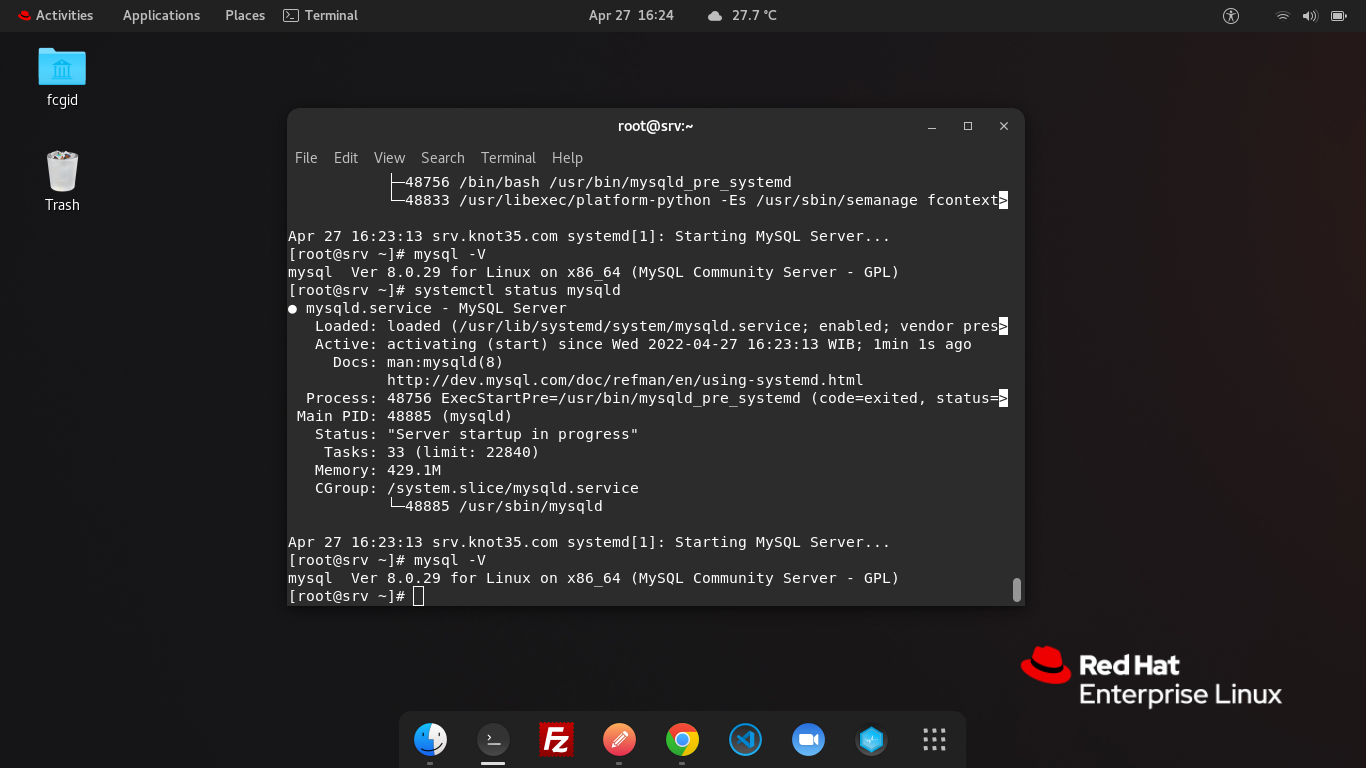
Apart from that, we can also check the status of the MySQL server using the following command:
$ systemctl status mysqld
● mysqld.service - MySQL Server
Loaded: loaded (/usr/lib/systemd/system/mysqld.service; enabled; vendor pres>
Active: activating (start) since Wed 2022-04-27 16:23:13 WIB; 1min 1s ago
Docs: man:mysqld(8)
http://dev.mysql.com/doc/refman/en/using-systemd.html
Process: 48756 ExecStartPre=/usr/bin/mysqld_pre_systemd (code=exited, status=>
Main PID: 48885 (mysqld)
Status: "Server startup in progress"
Tasks: 33 (limit: 22840)
Memory: 429.1M
CGroup: /system.slice/mysqld.service
└─48885 /usr/sbin/mysqld

Apr 27 16:23:13 srv.knot35.com systemd[1]: Starting MySQL Server...
8.) Check and Verify MySQL Version
On the last step you can check and verify MySQL version installed on your RHEL8 machine using the following commands.
$ mysql -V
mysql Ver 8.0.29 for Linux on x86_64 (MySQL Community Server - GPL)

CONCLUSION:
You have successfully in setting up, install and configure MySQL 8.0 database server on Red Hat Enterprise Linux 8.5 (RHEL). After that you can utilize it to manage hosted applications or your website under RHEL machine.
