
Start your VPS now with FREE $100 credit.
One of the most popular cloud compute services besides Google Cloud Platform (GCP) is of course Amazon Web Service (AWS) with their best selling product service, “AWS EC2 Instance”.
Well, today we are going to teach you step by step on how to gain ROOT Access or SUDO Privileges from an AWS EC2 instance. This should be done on your side after deploying a fresh virtual machine from Amazon Web Service (AWS).
Without root access and sudo privileges you will find it difficult to manage your virtual machine. With root access we can do whatever we want in a Linux-based virtual machine, whether it’s installing, removing or modifying certain packages and software.
However, be sure to meet the following requirements in order to obtain SSH Root Access and SUDO Privileges from an AWS EC2 instance (Amazon Elastic Compute).
Pre-requisites:
- VPS, Cloud, Bare Metal or Physical Servers
- Running under Debian/Ubuntu or RHEL-based distros
- Superuser Privileges or Root Access
- Must Be Familiar with Linux Command Line (CLI-Based Only)
- gNome Terminal for Linux Desktop
- PuTTy SSH Client for Windows and MacOS
- PowerShell for Windows 10/11
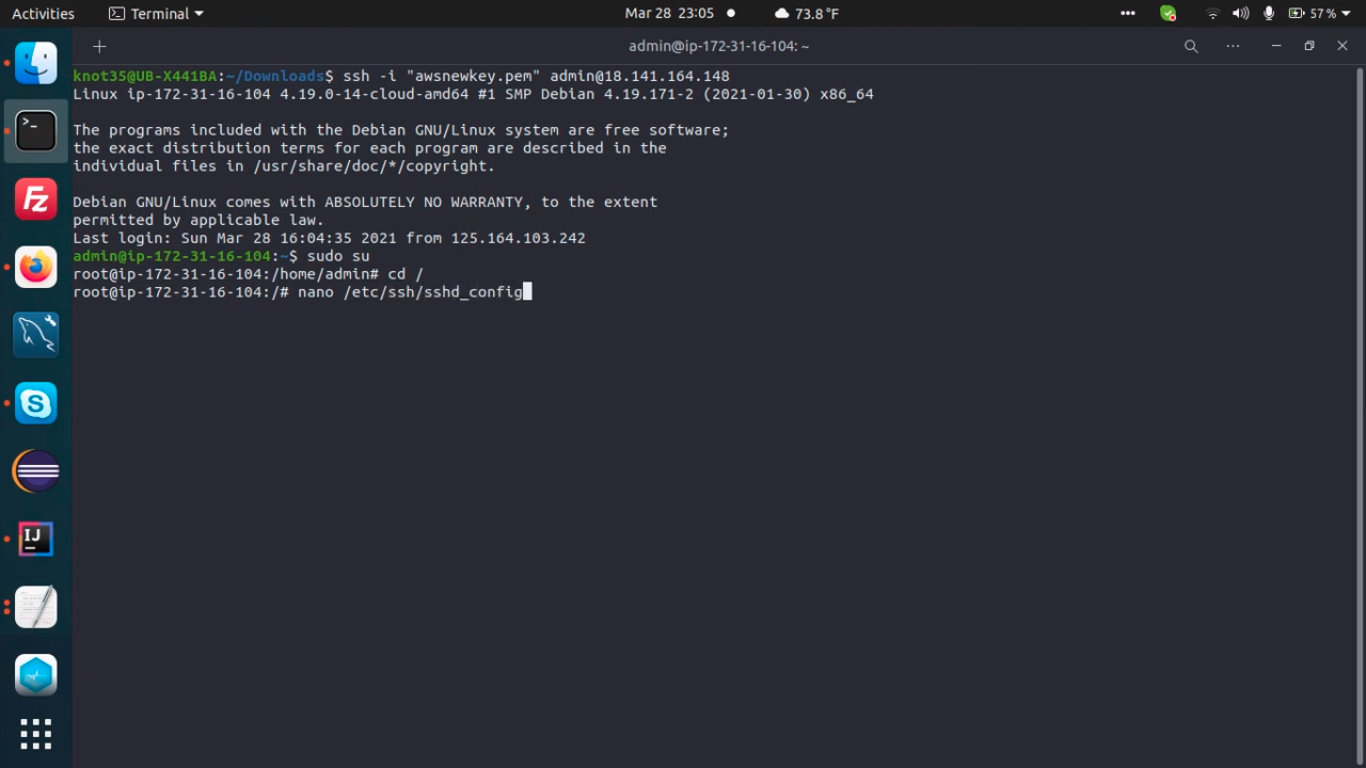
1. Login to SSH as AWS-EC2 user with the private key you generated earlier
For example:
$ [email protected]
Please note:
- 239.113.164.22 is an example of Server IPv4 Address.
- You can replace “ec2-user” with another common users like admin, debian, centos, ami, or ubuntu (It’s mandatory on Ubuntu 14.04 LTS +, including 16.04, 18.04, 20.04 and 22.04 LTS).
$ [email protected]
2. Execute the following command to gain root privileges
$ sudo su root
OR
$ sudo -i
3. Create Root Password
Simply execute the following command to create a root password for your Linux machine under AWS EC2 instance.
$ passwd root
4. Edit SSHD Config File
Let’s modify sshd_config file with the following variable, and then save it.
$ nano /etc/ssh/sshd_config

PermitRootLogin yes
StrictModes yes
PasswordAuthentication yes
Or simply run the following command.
$ sudo sed -i 's/prohibit-password/yes/' /etc/ssh/sshd_config
5. Restart SSHD Daemon
Restart SSHD Daemon or SSH Service using the following commands.
For Debian/Ubuntu:
For RHEL-based distros, like CentOS and Amazon Linux AMI:
$ service sshd restart (centOS)6. Copy SSH Key
Next, simply copy SSH key from AWS-EC2 user directory to the root user directory
$ cp ~ec2-user/.ssh/authorized_keys ~root/.ssh/authorized_keys
For some distros:
cp ~ubuntu/.ssh/authorized_keys ~root/.ssh/authorized_keys
cp ~centos/.ssh/authorized_keys ~root/.ssh/authorized_keys
cp ~admin/.ssh/authorized_keys ~root/.ssh/authorized_keys
cp ~ami/.ssh/authorized_keys ~root/.ssh/authorized_keys
7. Modify cloud.cfg File
After that you need to edit or modify a file of /etc/cloud/cloud.cfg and change the following entry to this value:
$ nano /etc/cloud/cloud.cfg
For Debian/Ubuntu:
$ disable_root false
OR
$ disable_root: false
For RHEL-based distros, including Fedora, CentOS, Amazon Linux AMI, Rocky Linux and AlmaLinux:
$ disable_root: 0
$ ssh_pwauth: 0
8. Restart SSH Server
Then you can restart your SSH service using the following commands.
$ service ssh restart (Debiah/Ubuntu)
$ service sshd restart (RHEL/CentOS)
Conclusion
Now you know that gaining root access or sudo privileges from an Amazon EC2 instance is very easy to do. Just follow some of the steps above, then you’ve got full access of the machine you just deployed in AWS.
Please note that if there are errors in writing this documentation, we may modify this article at a later time.
