
Start your VPS now with FREE $100 credit.
In today’s guide we will teach you on how to install and configure Netdata on Ubuntu 18.04 LTS (Bionic Beaver). Netdata is a real-time performance monitoring agent for infrastructure like cloud compute, physical / vps (virtual private servers), bare metal or dedicated server. It’s designed especially for system administratos (sysadmin), DevOps engineers, and Delevopers who want grab everything from their infrascructure to monitoring their stack or systems. Beside that, you can also troubleshooting if you found any errors or complex performance issues on your infrastructure.
Netdata can collects or grab almost all metrics from your infrastructure, systems and hardware with very minimal configuration. Almost all Linux-based operating system can run Netdata, like Debian/Ubuntu family or RHEL/CentOS/Fedora, as well as containerizated application including Kubernetes and Docker. You can also install Netdata on other operating system, including MacOS and FreeBSD.
It’s open-source, free and preconfigured software which released under GPL v3.0 license, so you can use, modify or distribute it freely without at any costs. Please note that we run Netdata to run realtime performance monitoring on dedicated server with 64GB of RAM / memory, 12 CPU Core, and 240 SSD storage. Kindly read the following tutorial in order to install and configure Netdata on Ubuntu 18.04 LTS (Bionic Beaver).
PREREQUISITES:
* VPS / Cloud / Bare-Metal Server
* Ubuntu 18.04 LTS (Bionic Beaver) x86_64
* Server IPv4 Address
* gNome Terminal for Linux Desktop
* PuTTy SSH Client for Windows/Mac
* Register at Netdata.cloud
1.) Login to SSH Terminal and Run System Update
On the first step you can log in to your node server via terminal and then run system update to get the latest stable available packages and softwares from the official OS vendor.
$ apt update && apt upgrade -y
2.) Install Curl or Wget Commands.
Make sure you have curl or wget installed on your machine. If the packages are not yet installed, simply run the following commands to install curl and wget.
$ apt install curl wget -y
3.) Create a New War Room and Connect Your Nodes to Netdata Cloud
You need to create a New War Room and then connect your node to the Netdata Cloud. After that run the netdata installer with a few command below on your SSH or gNome Terminal. The following are example of commands to connect from your node server into Netdata cloud. So, make sure to replace it with the commands you get on your Netdata account.
* Install Netdata using WGET Command:
wget -O /tmp/netdata-kickstart.sh https://my-netdata.io/kickstart.sh && sh /tmp/netdata-kickstart.sh --claim-token 7if97xbwI3fT2QOly_njg9Q8nTaqxLWSrwL2GCHLee1x1xAPMmhvjIVrUNUteuSm5yKMvY4xXD_4yYT1j-d84g73qrx2JwAZc8_9WajKoHbchgGzPuRoUxOksGLsNz5NE23C638 --claim-rooms 1131b634-3355-42e4-972b-9ba286371b70 --claim-url https://app.netdata.cloud
* Install Netdata using CURL Command:
wget -O /tmp/netdata-kickstart.sh https://my-netdata.io/kickstart.sh && sh /tmp/netdata-kickstart.sh --claim-token 7if97xbwI3fT2QOly_njg9Q8nTaqxLWSrwL2GCHLee1x1xAPMmhvjIVrUNUteuSm5yKMvY4xXD_4yYT1j-d84g73qrx2JwAZc8_9WajKoHbchgGzPuRoUxOksGLsNz5NE23C638 --claim-rooms 1131b634-3355-42e4-972b-9ba286371b70 --claim-url https://app.netdata.cloud
Wait a few second until Netdata installed completed.
NOTE: Make sure to copy paste above code on your Netdata Cloud account, also change your claim-rooms and claim-token numbers with your actual numbers.
4.) Install Netdata on Docker
Apart from that, if you have container platforms like Docker, of course, you can also install it on your container applications. Just run it with a few command below.
*** Install and connect Netdata to your new Docker containers
docker run -d --name=netdata \
-p 19999:19999 \
-v netdataconfig:/etc/netdata \
-v netdatalib:/var/lib/netdata \
-v netdatacache:/var/cache/netdata \
-v /etc/passwd:/host/etc/passwd:ro \
-v /etc/group:/host/etc/group:ro \
-v /proc:/host/proc:ro \
-v /sys:/host/sys:ro \
-v /etc/os-release:/host/etc/os-release:ro \
--restart unless-stopped \
--cap-add SYS_PTRACE \
--security-opt apparmor=unconfined \
-e NETDATA_CLAIM_TOKEN=7if97xbwI3fT2QOly_njg9Q8nTaqxLWSrwL2GCHLee1x1xAPMmhvjIVrUNUteuSm5yKMvY4xXD_4yYT1j-d84g73qrx2JwAZc8_9WajKoHbchgGzPuRoUxOksGLsNz5NE23C638 \
-e NETDATA_CLAIM_URL=https://app.netdata.cloud \
-e NETDATA_CLAIM_ROOMS=1131b634-3355-42e4-972b-9ba286371b70 \
netdata/netdata
5.) Install Netdata on Kubernetes Clusters
You should use “helm install” to install Netdata on your Kubernetes clusters. Use the following commands to run it.
helm install netdata netdata/netdata \
--set parent.claiming.enabled="true" \
--set parent.claiming.token=7if97xbwI3fT2QOly_njg9Q8nTaqxLWSrwL2GCHLee1x1xAPMmhvjIVrUNUteuSm5yKMvY4xXD_4yYT1j-d84g73qrx2JwAZc8_9WajKoHbchgGzPuRoUxOksGLsNz5NE23C638 \
--set parent.claiming.rooms=1131b634-3355-42e4-972b-9ba286371b70 \
--set child.claiming.enabled=”true” \
--set child.claiming.token=7if97xbwI3fT2QOly_njg9Q8nTaqxLWSrwL2GCHLee1x1xAPMmhvjIVrUNUteuSm5yKMvY4xXD_4yYT1j-d84g73qrx2JwAZc8_9WajKoHbchgGzPuRoUxOksGLsNz5NE23C638 \
--set child.claiming.rooms=1131b634-3355-42e4-972b-9ba286371b70
For existing clusters, you must add the following snippet code to your override.yaml and then run “helm upgrade -f override.yml netdata netdata/netdata”.
parent:
claiming:
enabled: true
token: 7if97xbwI3fT2QOly_njg9Q8nTaqxLWSrwL2GCHLee1x1xAPMmhvjIVrUNUteuSm5yKMvY4xXD_4yYT1j-d84g73qrx2JwAZc8_9WajKoHbchgGzPuRoUxOksGLsNz5NE23C638
rooms: 1131b634-3355-42e4-972b-9ba286371b70

child:
claiming:
enabled: true
token: 7if97xbwI3fT2QOly_njg9Q8nTaqxLWSrwL2GCHLee1x1xAPMmhvjIVrUNUteuSm5yKMvY4xXD_4yYT1j-d84g73qrx2JwAZc8_9WajKoHbchgGzPuRoUxOksGLsNz5NE23C638
rooms: 1131b634-3355-42e4-972b-9ba286371b70
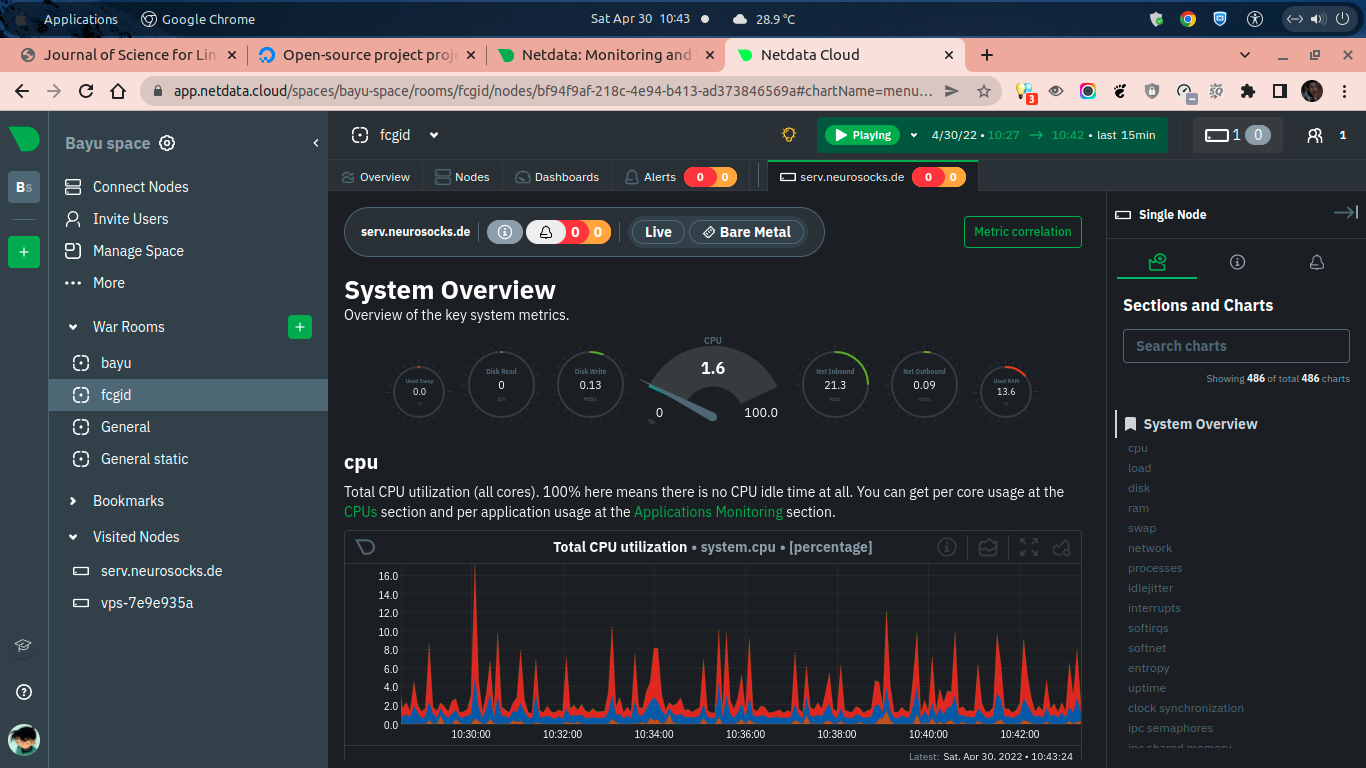
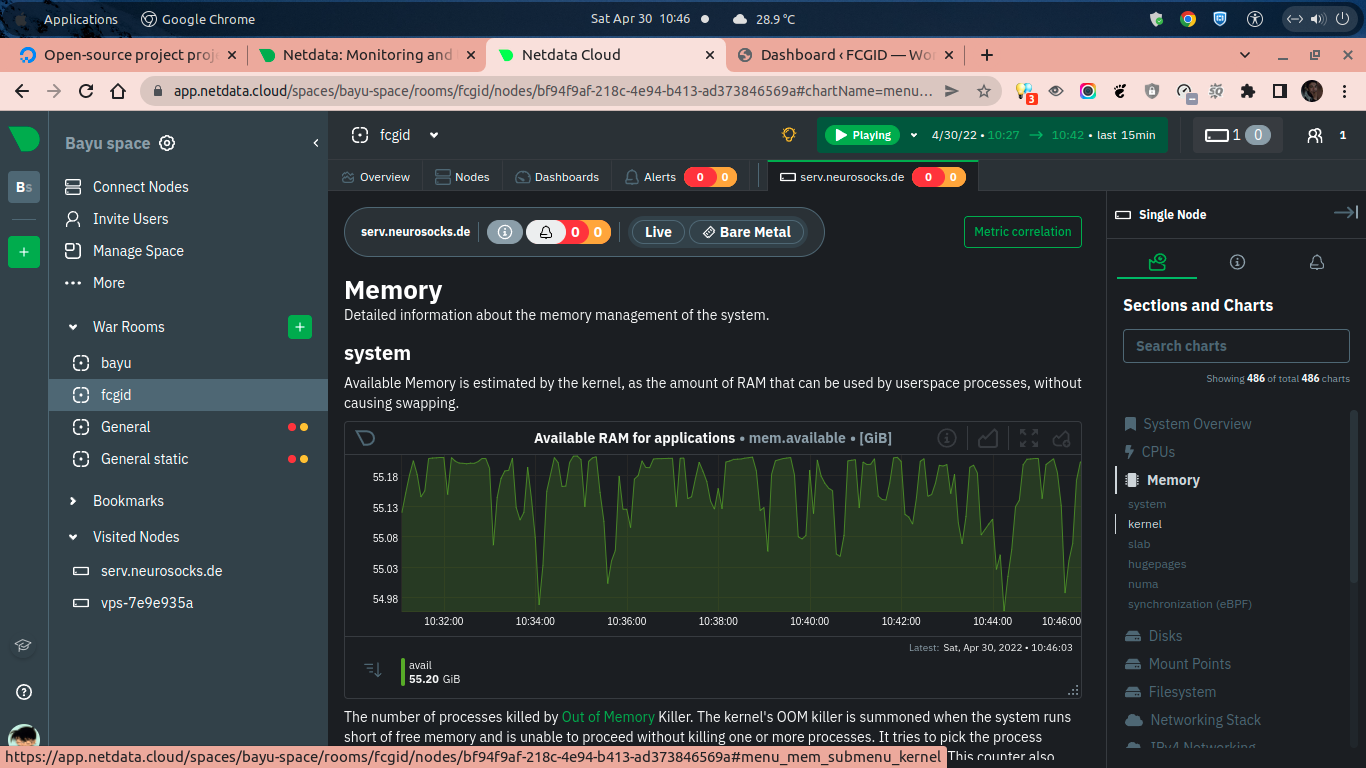
We need to wait for a while until Netdata grab all metrics from your infrastructure or systems. After that you can monitor your overal system performance of your node server via Netdata on web browser.
