
Start your VPS now with FREE $100 credit.
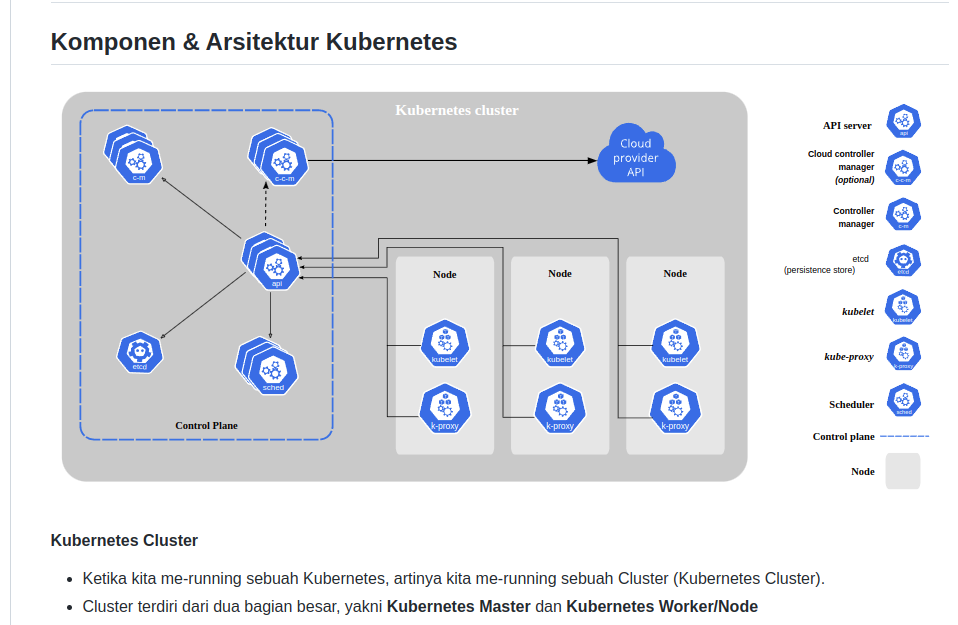
Today I will show you on how to install Kubernetes or also called K8s on Debian 11 (Bullseye) machine. It’s easy enough to install and configure it on Debian/Ubuntu based distros. As a production-grade container orchestration engine, Kubernetes is an open-source software for automating deployment, scaling, and management for containerized applications.
Google was iniated Kubernetes, however for now Cloud Native Computing Foundation (CNCF) maintains this project. It’s free to use on almost all operating system like Windows, Linux and Mac, since it open-source software under Apache License 2.0. Some of the biggest companies in the world like Google, Amazon, IBM, Microsoft, Oracle, and Red Hat offer their infrastructure as a service (IaaS product) to deploying Kubernetes.
Kubernetes having 15 years of experience on running production workloads at Google, and get the best ideas and practices from the open-source software community. K8s are container groups which deploying an application into logigal units to get an easy for management and discovery. It can run both with Docker, Containerd, and CRI-O (Container Runtime Interface).
To install Kubernetes on Debian 11 (Bullseye) machine, simply follow the guide tutorial. We can install kubernetes using native package management.
REQUIRENMENTS:
* VM, Cloud or Physical Servers
* Local Machine like Virtualbox or vMware
* OS Distro based on Debian 11 (Bullseye)
* Superuser Privileges or Root Access
* gNome Terminal for Linux Desktop
* PuTTy SSH Client or Powershell for Windows 10/11
1.) Run System Update and Install Some Package Dependency
$ sudo apt-get update
$ sudo apt-get install -y apt-transport-https ca-certificates curl
2.) Download the Google Cloud public (GCP) signing key using curl command.
$ sudo curl -fsSLo /usr/share/keyrings/kubernetes-archive-keyring.gpg https://packages.cloud.google.com/apt/doc/apt-key.gpg
3.) Add Kubernetes APT Repository
From this step we should add Kubernetes APT repository into your Ubuntu machine.
$ echo "deb [signed-by=/usr/share/keyrings/kubernetes-archive-keyring.gpg] https://apt.kubernetes.io/ kubernetes-xenial main" | sudo tee /etc/apt/sources.list.d/kubernetes.list
4.) Let’s Install Kubernetes
Then let update the sofwate package index and install Kubernetes with the following commands.
$ sudo apt-get update
$ sudo apt-get install -y kubectl kubeadm kubelet kubernetes-cni
5.) Verify Kubectl Configuration
After that don’t forget to verify kubectl configuration, so kubectl can find and access into the Kubernetes clusters. Then we should create “config” file under “$HOME/.kube/” or “/root/.kube/” directories and write the coding syntax manually. Or you can create it automatically using “kube-up.sh” when you create a kubernetes cluster or deploy it using Minikube clusters. Kubectl configuration is located at ~/.kube/config on its default installation.
You can check the cluster state and verify that kubectl is properly configured with the following commands:
$ kubectl cluster-info
Kubernetes control plane is running at https://44e3f1cc-8f04-4a01-82d0-65ffa994cb40.k8s.ondigitalocean.com
CoreDNS is running at https://44e3f1cc-8f04-4a01-82d0-65ffa994cb40.k8s.ondigitalocean.com/api/v1/namespaces/kube-system/services/kube-dns:dns/proxy
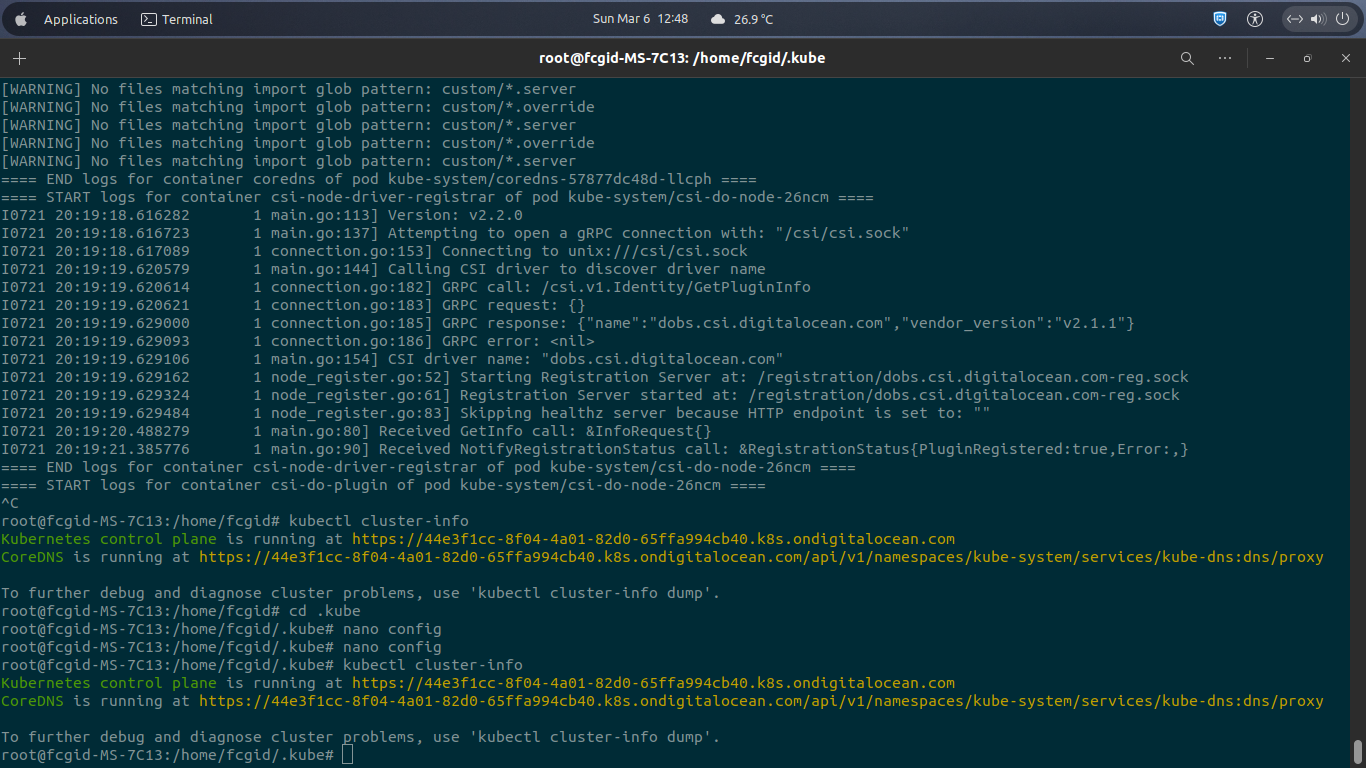
As you can see on the above URL responses, kubectl is properly configured and you can get access into the kubernetes cluster. If you can’t access your cluster, although you can get cluster state response, you can check it’s properly configured or not with the following commands:
$ kubectl cluster-info dump
6.) The connection to the server localhost:8080 was refused – did you specify the right host or port?
If you see a above response after run command “kubectl cluster-info”, it indicate that kubectl is not properly configured on your system. So, it’s not able to communicate and connect to a Kubernetes cluster. Please note that you install Kubernetes on local machine, either it desktop or laptop you need to install Minikube as well.
Finished… you have successfuly install Kubernetes on Debian 11 (Bullseye) with above tutorial. You can apply this guide as well on another Debian/Ubuntu-based distros.
