
Start your VPS now with FREE $100 credit.
ConfigServer Security & Firewall (CSF LFD) is a stateful Packet Inspection (SPI) firewall with Login/Intrusion Detection and Security application designed exclusively for Linux-based servers.
It can work perfectly in various Linux distribution systems, including Red Hat Enterprise Linux 7/8, CentOS 7/8, RockyLinux 8, CloudLinux 7/8, AlmaLinux 8, Fedora 30+, openSUSE 10/11/12, Debian 8/9/10/11, Ubuntu 18.04 – 20.04 LTS, and Slackware 12.
CSF and LFD (ConfigServer Security & Firewall and Login Failure Daemon) can running very in different virtualization type, including VMware, Xen, VirtualBox, MS Virtual Server and KVM a.k.a Kernel-based Virtual Machine.
Well, today we will teach you step by step on how to fix 10 common errors found in ConfigServer Security & Firewall (CSF LFD). Be sure to meet the following requirements before moving on to the troubleshooting section.
PRE-REQUISITES:
- VPS, Cloud, Bare Metal or Physical Servers
- Running under Linux-based distros
- ConfigServer Security & Firewall (CSF) must be installed
- Superuser Privileges or Root Access
- Must Be Familiar with Linux Command Line (CLI-Based Only)
gNome Terminal for Linux Desktop
PuTTy SSH Client for Windows and MacOS
PowerShell for Windows 10/11
1. ERROR CSF *WARNING* Binary location for [CHATTR] [/usr/bin/chattr] in /etc/csf/csf.conf is either incorrect, is not installed or is not executable
If you are facing the above problem after installing CSF Firewall, just execute the following command to solve this problem.
SOLUTIONS:
For Ubuntu/Debian:
$ apt-get install e2fsprogs
For RHEL-based distros like CentOS:
$ yum install e2fsprogs
2. Oops Unable to download Protocol scheme ‘https’ is not supported (IOSocketSSL not installed)
We need to install some modules like perl-Crypt-SSLeay and perl-Net-SSLeay on CentOS-based machine to fix the above issues. Simply run the following command to solve it.
$ yum install perl-Crypt-SSLeay perl-Net-SSLeay
Then, try to update CSF & LFD.
$ csf -u
3. CSF Error Oops Unable to download Protocol scheme ‘https’ is not supported (LWPProtocolhttps not installed):
This problem is usually found on the CentOS machines or in almost all RedHat-based distros. To solve it, just execute the command below.
$ yum install perl-LWP-Protocol-https
4. CSF Error open3: exec of /usr/bin/systemctl is-active firewalld failed: No such file or directory at /usr/sbin/csf line 906.
This error was encountered for the first time after installing and restarting CSF LFD Firewall on VestaCP running under Ubuntu 18.04 LTS server distro, with the following error log:
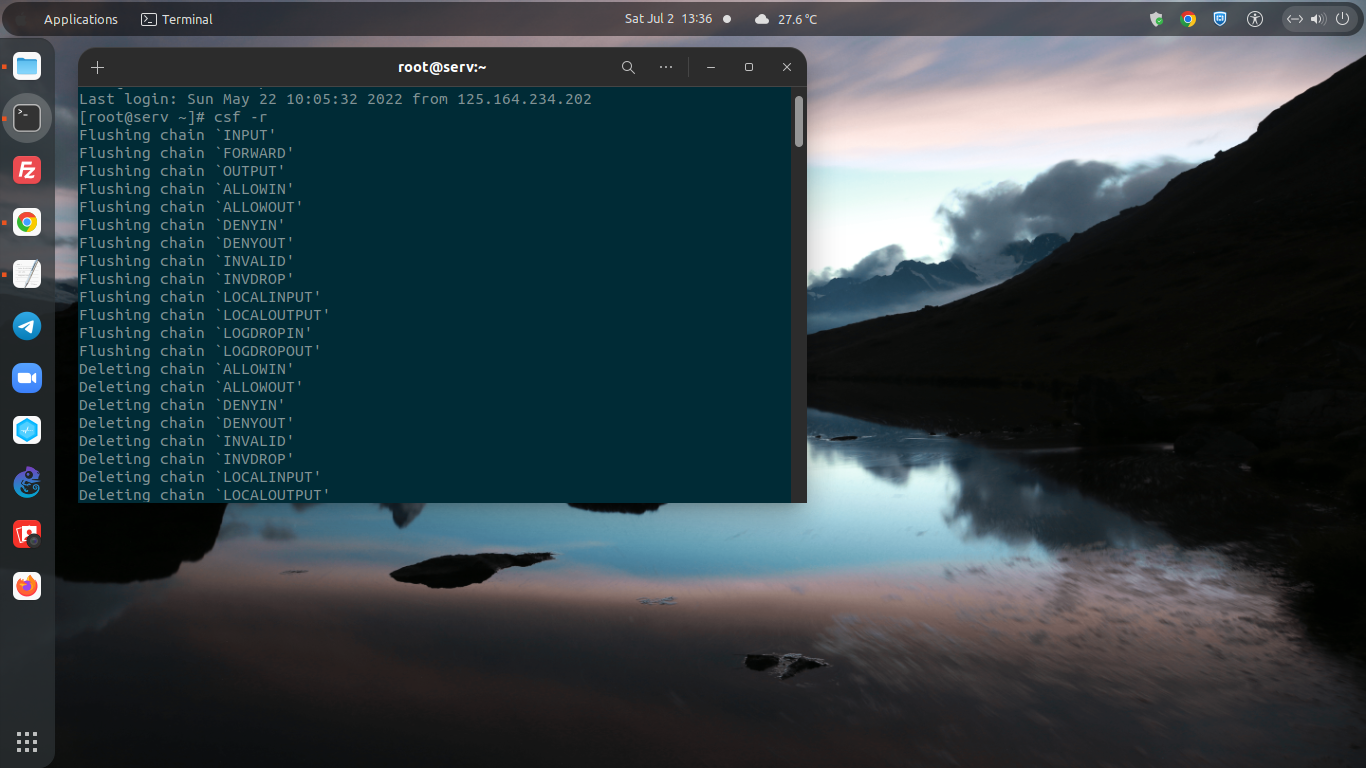
--------------------------------------------------------
root@serv:/usr/local/src/csf# csf -r
Flushing chain `INPUT'
Flushing chain `FORWARD'
Flushing chain `OUTPUT'
Flushing chain `PREROUTING'
Flushing chain `INPUT'
Flushing chain `OUTPUT'
Flushing chain `POSTROUTING'
Flushing chain `PREROUTING'
Flushing chain `OUTPUT'
Flushing chain `PREROUTING'
Flushing chain `INPUT'
Flushing chain `FORWARD'
Flushing chain `OUTPUT'
Flushing chain `POSTROUTING'
Flushing chain `INPUT'
Flushing chain `FORWARD'
Flushing chain `OUTPUT'
Flushing chain `PREROUTING'
Flushing chain `INPUT'
Flushing chain `OUTPUT'
Flushing chain `POSTROUTING'
Flushing chain `PREROUTING'
Flushing chain `OUTPUT'
Flushing chain `PREROUTING'
Flushing chain `INPUT'
Flushing chain `FORWARD'
Flushing chain `OUTPUT'
Flushing chain `POSTROUTING'
open3: exec of /usr/bin/systemctl is-active firewalld failed: No such file or directory at /usr/sbin/csf line 906.
--------------------------------------------------------
Solutions
A.) Open a “csf.conf” file inside directory of /etc/csf. You can use nano editor or your preffered Linux text editors.
$ nano /etc/csf/csf.conf
------------------------------------------------------
B.) Scroll to the line 906, where there is a binary setting called SYSTEMCTL = “/usr/bin/systemctl”
###############################################################################
# SECTION:OS Specific Settings
###############################################################################
# Binary locations
IPTABLES = "/sbin/iptables"
IPTABLES_SAVE = "/sbin/iptables-save"
IPTABLES_RESTORE = "/sbin/iptables-restore"
IP6TABLES = "/sbin/ip6tables"
IP6TABLES_SAVE = "/sbin/ip6tables-save"
IP6TABLES_RESTORE = "/sbin/ip6tables-restore"
MODPROBE = "/sbin/modprobe"
IFCONFIG = "/sbin/ifconfig"
SENDMAIL = "/usr/sbin/sendmail"
PS = "/bin/ps"
VMSTAT = "/usr/bin/vmstat"
NETSTAT = "/bin/netstat"
LS = "/bin/ls"
MD5SUM = "/usr/bin/md5sum"
TAR = "/bin/tar"
CHATTR = "/usr/bin/chattr"
UNZIP = "/usr/bin/unzip"
GUNZIP = "/bin/gunzip"
DD = "/bin/dd"
TAIL = "/usr/bin/tail"
GREP = "/bin/grep"
ZGREP = "/usr/bin/zgrep"
IPSET = "/usr/sbin/ipset"
SYSTEMCTL = "/usr/bin/systemctl"
HOST = "/usr/bin/host"
IP = "/sbin/ip"
------------------------------------------------------
C.) Then search for systemctl on your server using the following command.
------------------------------------------------------
$ which systemctl
$ whereis systemctl
------------------------------------------------------
D.) Well then we will get output like below:
$ which systemctl
/bin/systemctl

$ whereis systemctl
systemctl: /bin/systemctl /usr/share/man/man1/systemctl.1.gz
E.) Then go back to the csf.conf file and edit it exactly like this:
$ SYSTEMCTL = "/usr/bin/systemctl" TO SYSTEMCTL = "/bin/systemctl"
Before:
SYSTEMCTL = "/usr/bin/systemctl"
After:
SYSTEMCTL = "/bin/systemctl"############################################################################### # SECTION:OS Specific Settings ############################################################################### # Binary locations IPTABLES = "/sbin/iptables" IPTABLES_SAVE = "/sbin/iptables-save" IPTABLES_RESTORE = "/sbin/iptables-restore" IP6TABLES = "/sbin/ip6tables" IP6TABLES_SAVE = "/sbin/ip6tables-save" IP6TABLES_RESTORE = "/sbin/ip6tables-restore" MODPROBE = "/sbin/modprobe" IFCONFIG = "/sbin/ifconfig" SENDMAIL = "/usr/sbin/sendmail" PS = "/bin/ps" VMSTAT = "/usr/bin/vmstat" NETSTAT = "/bin/netstat" LS = "/bin/ls" MD5SUM = "/usr/bin/md5sum" TAR = "/bin/tar" CHATTR = "/usr/bin/chattr" UNZIP = "/usr/bin/unzip" GUNZIP = "/bin/gunzip" DD = "/bin/dd" TAIL = "/usr/bin/tail" GREP = "/bin/grep" ZGREP = "/usr/bin/zgrep" IPSET = "/usr/sbin/ipset" SYSTEMCTL = "/bin/systemctl" HOST = "/usr/bin/host" IP = "/sbin/ip" ------------------------------------------------------
F.) OK ALL DONE, then restart CSF and LFD using the following commands.
$ csf -r
$ lfd -r
------------------------------------------------------
5. CSF ERROR: Testing ip_tablesiptable_filter…open3 exec of sbiniptables -I OUTPUT -p tcp –dport 9999 -j ACCEPT failed at usrlocalcsfbincsftest.pl line 144.
To fix the above issue, the solution is simply run the following command to install the iptables package, either it on Debian/Ubuntu or RHEL/CentOS machine.
Ubuntu/Debian:
$ apt-get install iptables
RHEL/CentOS
$ yum install iptables
6. *Error* The path to iptables is either not set or incorrect for IPTABLES [/sbin/ip6tables] in /etc/csf/csf.conf at /usr/local/csf/lib/ConfigServer/URLGet.pm line 26.
If you encounter a problem like the one above, the solution is simply execute the following command.
Run this on the SSH terminal:
$ whereis iptables
The result as follow:
iptables: /usr/sbin/iptables /usr/share/iptables /usr/share/man/man8/iptables.8.gz
AND
$ whereis ip6tables
The result as follow:
$ ip6tables: /usr/sbin/ip6tables /usr/share/man/man8/ip6tables.8.gz
And update the file /etc/csf/csf.conf:
Binary locations
———————————————————————–
IPTABLES = "/usr/sbin/iptables"
IPTABLES_SAVE = "/usr/sbin/iptables-save"
IPTABLES_RESTORE = "/usr/sbin/iptables-restore"
IP6TABLES = "/usr/sbin/ip6tables"
IP6TABLES_SAVE = "/usr/sbin/ip6tables-save"
IP6TABLES_RESTORE = "/usr/sbin/ip6tables-restore"
And make sure it works for you, then restart the CSF LFD.
$ csf -r
$ lfd -r
-----------------------------------------------------------------------
7. *WARNING* Binary location for [SENDMAIL] [/usr/sbin/sendmail] in /etc/csf/csf.conf is either incorrect, is not installed or is not executable. *WARNING* Missing or incorrect binary locations will break csf and lfd functionality
To fix this problem the solution is simply to set the binary location for the SENDMAIL. Run the following command:
$ echo '#!/bin/sh' > /usr/sbin/sendmail
$ chmod +x /usr/sbin/sendmail
8. CSF Error WARNING Binary location for [UNZIP] [usrbinunzip] in etccsfcsf.conf is either incorrect, is not installed or is not executable.
Just install both zip and unzip packages with the following command.
For Ubuntu/Debian:
$ apt-get install zip unzip
For RHEL/CentOS:
$ yum install zip unzip
9. *WARNING* URLGET set to use LWP but perl module is not installed, reverting to HTTP::Tiny
The solution is very simple, just install the Perl module as follows:
For Debian/Ubuntu Server:
$ apt-get install libwww-perl
$ apt-get install perl-LWP-Protocol-https
For RHEL/CentOS Server:
$ yum install perl-libwww-perl
$ yum install perl-LWP-Protocol-https
Then set RESTRICT_SYSLOG from "0" to "3":
-------------------------------------------------------------------------------
$ RESTRICT_SYSLOG = "3"
-------------------------------------------------------------------------------
10.) ERROR CSF WARNING Binary location for [HOST] [usrbinhost] in etccsfcsf.conf is either incorrect, is not installed or is not executable
If you encounter the problem above, the solution is very simple, just install the BIND Utils or DNS Utils modules.
Solution for Ubuntu/Debian:
$ apt-get install dnsutils
Solution for RHEL/CentOS:
$ yum install bind-utils
Concolusion
To find a solution when we encounter some common errors in ConfigServer Security & Firewall (CSF LFD) is to read the error log first, and then we analyze the problem, before deciding to fix it.
